Notice: Function _load_textdomain_just_in_time was called incorrectly. Translation loading for the caldera-forms domain was triggered too early. This is usually an indicator for some code in the plugin or theme running too early. Translations should be loaded at the init action or later. Please see Debugging in WordPress for more information. (This message was added in version 6.7.0.) in /home/srv3/www/ROAROCKIT/dev/17/blog/wp-includes/functions.php on line 6121 Archives des thinairpress - Roarockit Blog
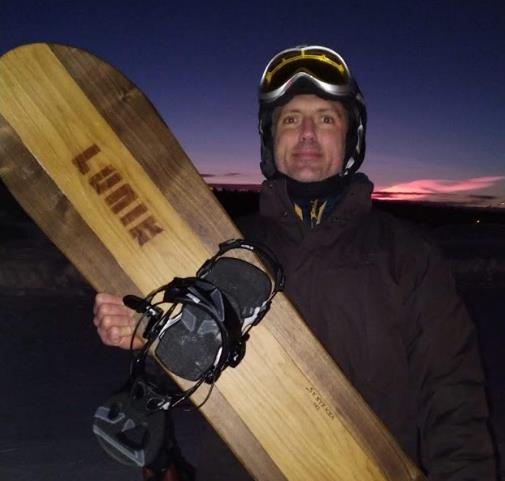
Bonjour, je m’appelle Alex et j’ai 41 ans. Je suis originaire de Compiègne dans l’Oise et je vis à Helsinki (Finlande) depuis presque 20 ans. Après une quinzaine d’années passées dans l’enseignement j’ai souhaité me réorienter vers la menuiserie. Je pratique les sports de glisse d’hiver depuis presque 40 ans, ski, snow, ski de fond et un peu de télémark…j’ai même connu le monoski !
1) Bonjour Alex, tu as fabriqué un snowboard, qu’est ce qui ta donné envie de le fabriquer toi-même ?
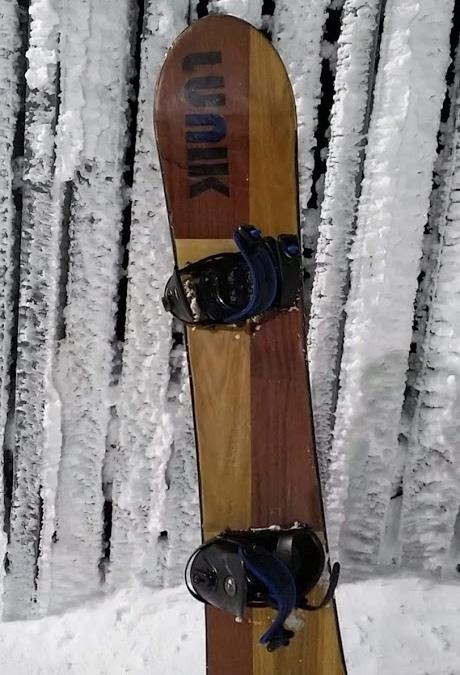
Tout est parti d’une discussion avec un ami sur les boards de la marque Hammer, un super fabricant de snows des années 90 malheureusement disparu depuis. On a voulu s’amuser à en reshaper une. De fil en aiguille, je me retrouve aujourd’hui à monter une entreprise de fabrication artisanale de skis, snows …skates et wakes (à venir). Lunik, basée à Helsinki. C’est un rêve qui prend forme.
2) Peux-tu nous expliquer les différentes étapes de la fabrication ?
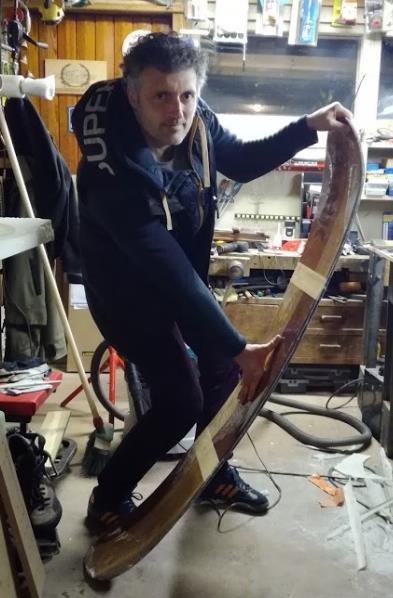
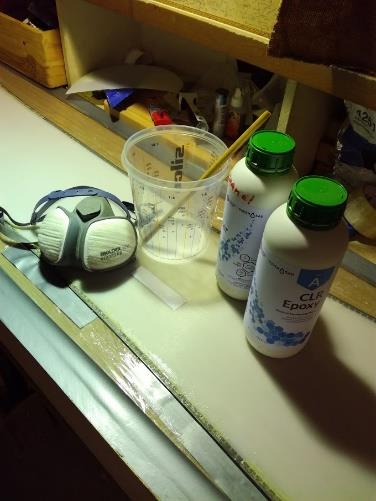
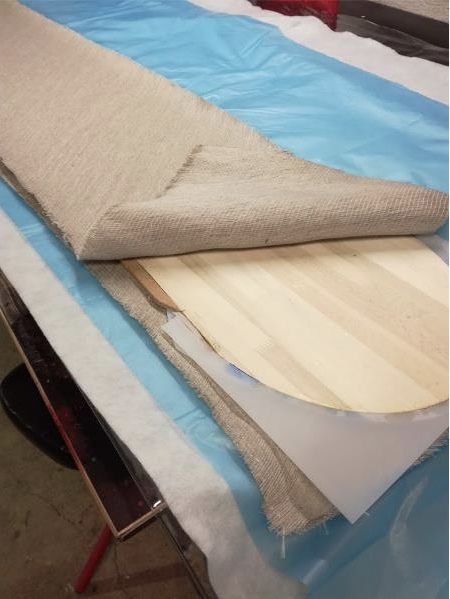
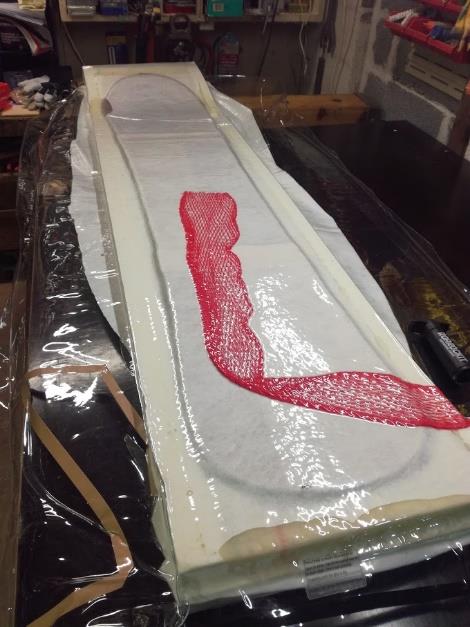
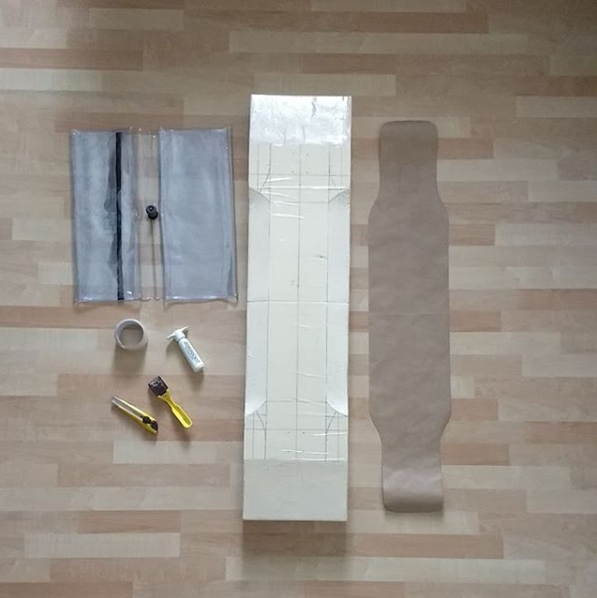
Pour les skis comme pour les snows, le principe est le même : le sandwich. Une semelle entourée de carres. Ensuite, j’utilise une première couche de fibres sur laquelle viendra se poser le noyau en bois. La deuxième couche de fibre puis le placage final. Tout est stratifié avec de la résine d’époxy. La particularité se trouve dans les composants. Il serait prétentieux de parler de planches bio alors j’utiliserais le concept de planches « raisonnables ». La semelle est Ptex (Isosport 7500) et les carres en acier. J’utilise des fibres naturelles de lin, du bois local (noyau et placage) et une résine biosourcée. Pour les champs j’utilise du chêne, local lui aussi.
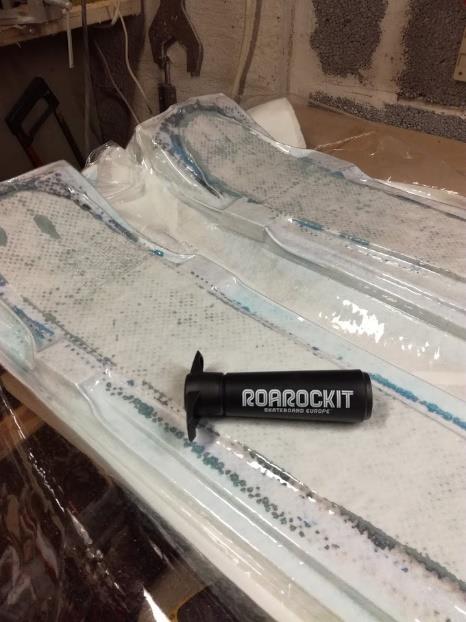
3) Tu utilises le système de presse Thin Air Press de Roarockit, pourquoi ce choix et comment as-tu connu Roarockit ?
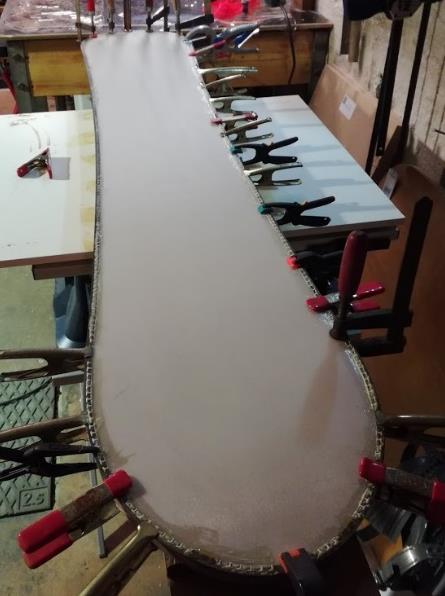
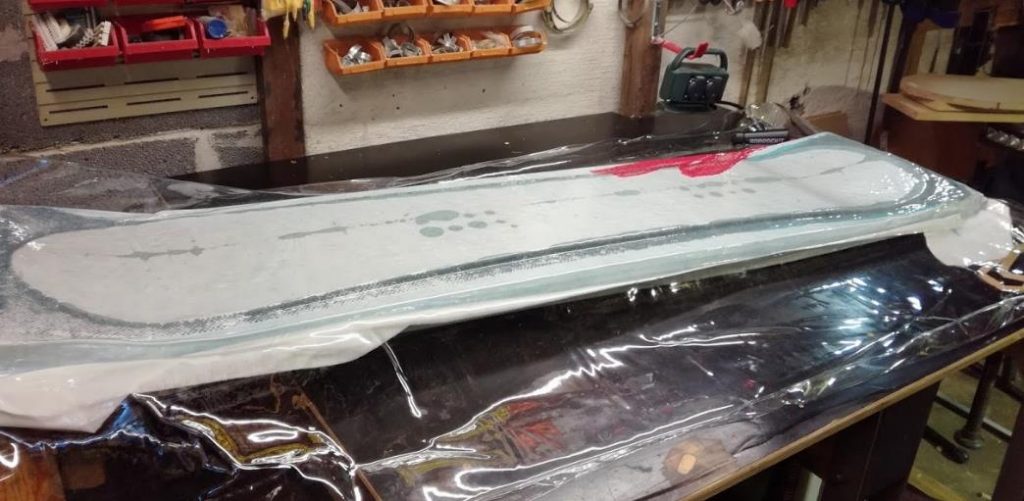
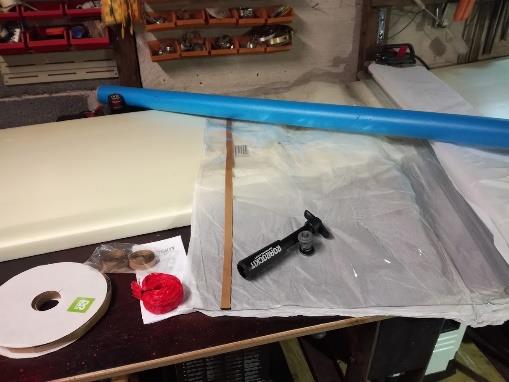
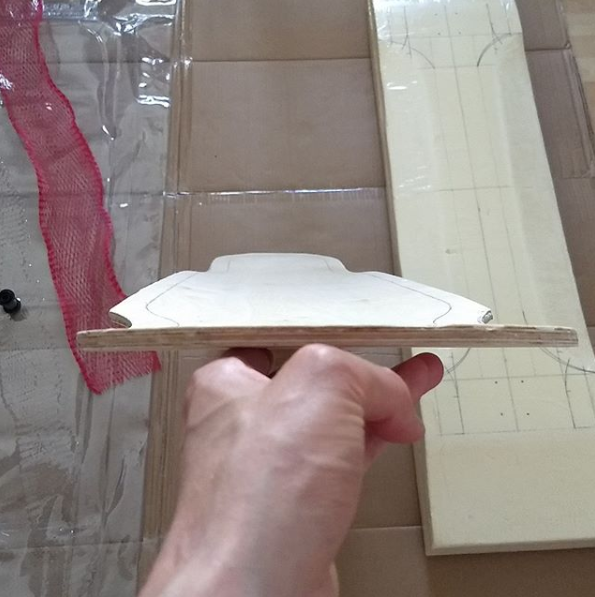
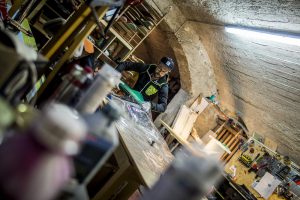
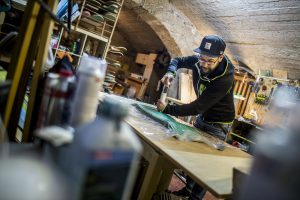
En effet, j’utilise le système de Roarockit. Je l’ai découvert tout simplement en lançant une recherche sur le net, presse à vide d’air. Il est super simple d’utilisation et efficace. Pour le moment, il m’a permis de presser 3 snowboards et 2 paires de skis. De plus, quand j’ai commencé ce projet, le manque de moyen (atelier dans un garage, pas de financement) m’a obligé à chercher les solutions les moins onéreuses et les plus accessibles. J’utilise le grand modèle (40×80 inches). Il est suffisamment long pour y glisser un moule en mousse haute densité et mon sandwich. Pour gagner du temps j’utilise un aspirateur de chantier pour évacuer la plus grosse partie de l’air puis la pompe livrée avec le kit. Jusqu’à aujourd’hui, rien à reprocher à ce système. La pression est suffisante pour laminer mes snows et mes skis, le vide tient jusqu’au lendemain. Et surtout, la presse se plie facilement et ne prend donc pas de place, ce qui est primordial quand on travaille dans un espace réduit.
4) Tu as maintenant pu tester la board (Laponie ?), qu’en penses-tu ? Parfait du premier coup ? Des améliorations à apporter ?
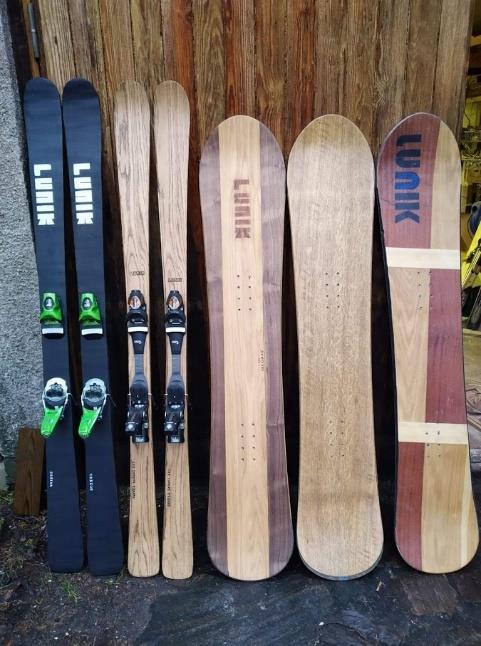
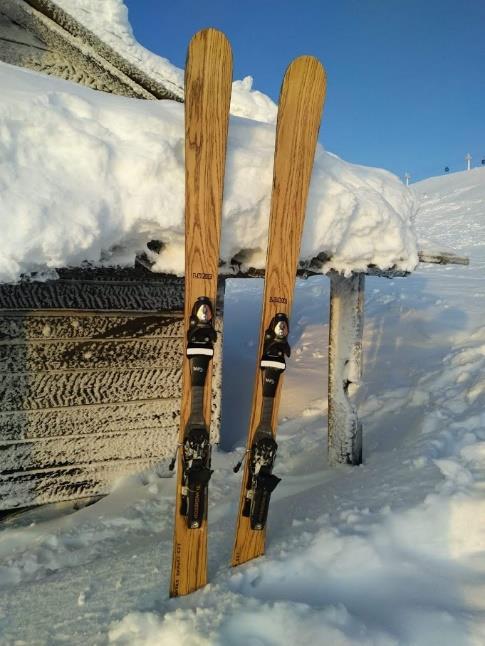
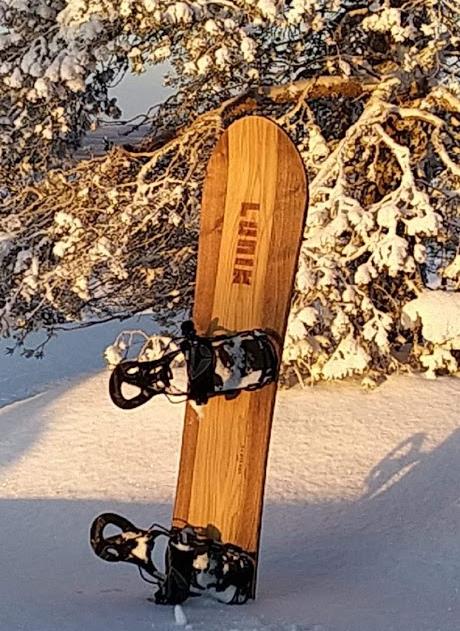
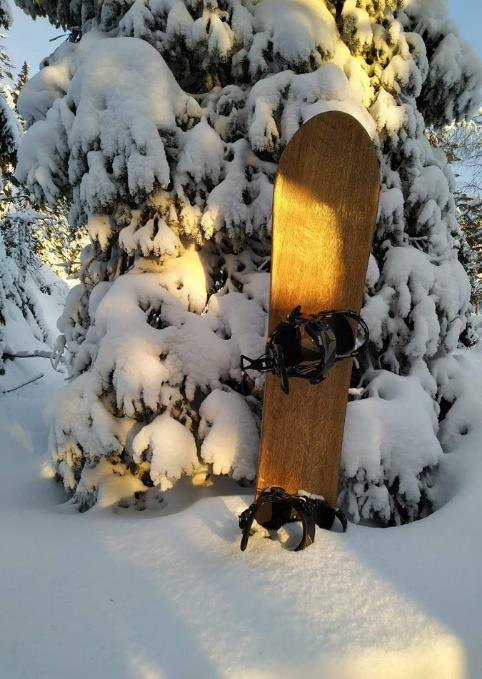
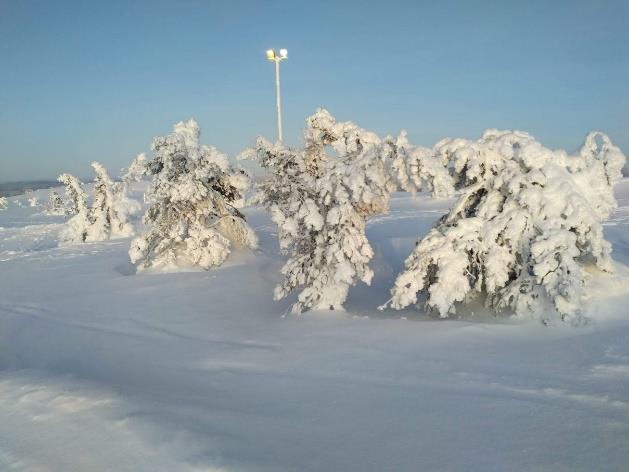
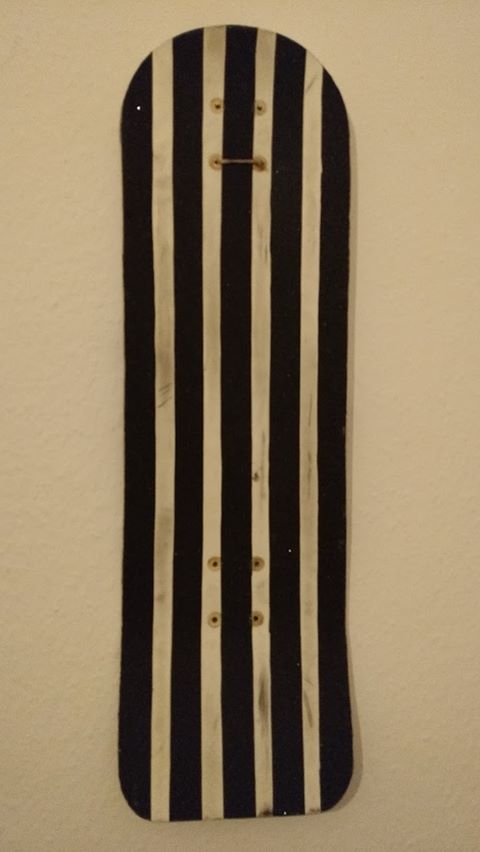
J’ai même pu tester 3 boards et 2 paires de skis. Ce que j’en pense, des boards ou de la Laponie ? Pour les planches, excellentes surprises à chaque fois. Que ce soit par rapport au shape donc au type d’utilisation, par rapport à l’épaisseur de noyau et au flex, tout correspondait à mes attentes. Des prototypes réussis. La Laponie, c’est comme sur les cartes postales. C’est froid, les journées sont courtes mais il y a de la super neige. Nous avons eu toutes les conditions possibles : Soleil, grosse tempête où même les téléskis devaient fermer, pistes bien dures et peuf entre les sapins.
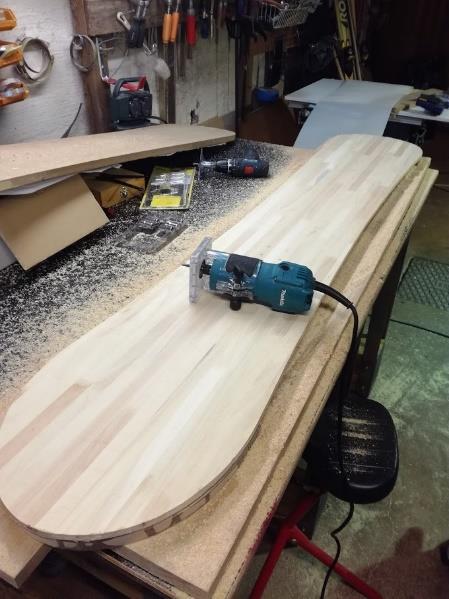
Parfait ? Hum…pas loin. Je dois maintenant améliorer les finitions afin de rendre ces produits vendables. Un exemple simple, utiliser des placages un peu plus fins, qui seront plus simples à laminer. Un petit détail qui a beaucoup d’importance.
5) As-tu d’autres projets en cours ou à venir ?
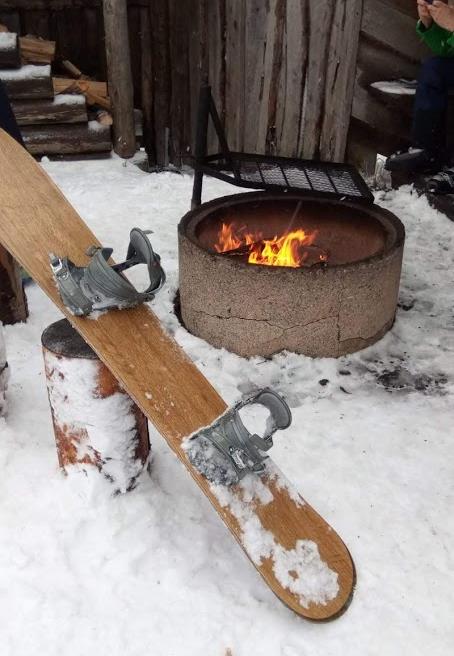
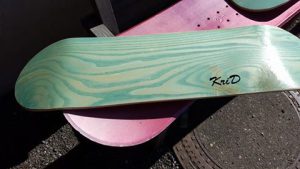
Je dois honorer ma première commande pour le début du mois de mars. Une paire de skis orientés piste avec une finition « chêne » (comme ceux de la photo). Les prochains prototypes seront axés sur la glisse printanière et estivale, à savoir skate et wakeboard. À terme, si l’entreprise se développe suffisamment, développer des ateliers de fabrication de skate au sein des écoles… je reste un peu prof dans l’âme. Et pour cela, je compte sur les produits Roarockit (promis, ils ne m’ont pas payé pour dire ça ).
6) Des remerciements, dédicaces ?
Tout d’abord, merci à Sarah de Roarockit de me proposer cette interview. Merci pour vos produits qui me permettent et me permettront de continuer à développer mon activité. Merci à mon épouse et à mes enfants qui me soutiennent dans ce projet. Un « special thank » pour Laurent (Skate Crisis @youtube) sans qui ce projet n’aurait certainement pas vu le jour.
Et merci à toutes celles et ceux qui m’aideront à réaliser mon rêve (Lunik) d’une quelconque manière que ce soit.
Merci Alex ! Et bon ride !
Vous pouvez voir la vidéo du test des skis et snowboard handmade d’Alex accompagné de Laurent en Laponie en cliquant sur ce lien.
Thank you for taking the time to be a part of our “Shaper of the month” articles. It is a pleasure to see and put forward your work!
– We will start with a little presentation of yourself. Where do you come from? How old are you? What is your life goal and what do you do now?
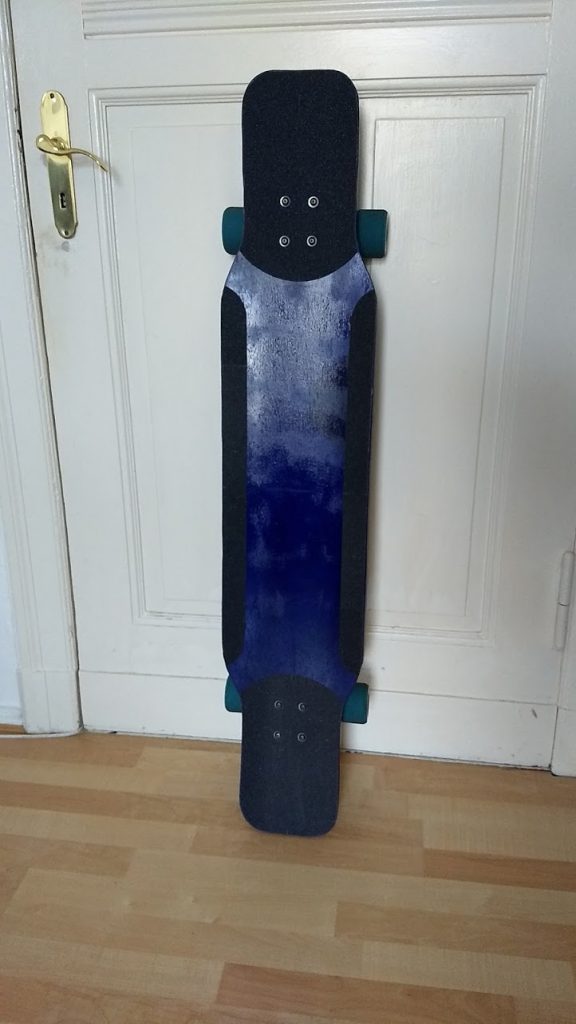
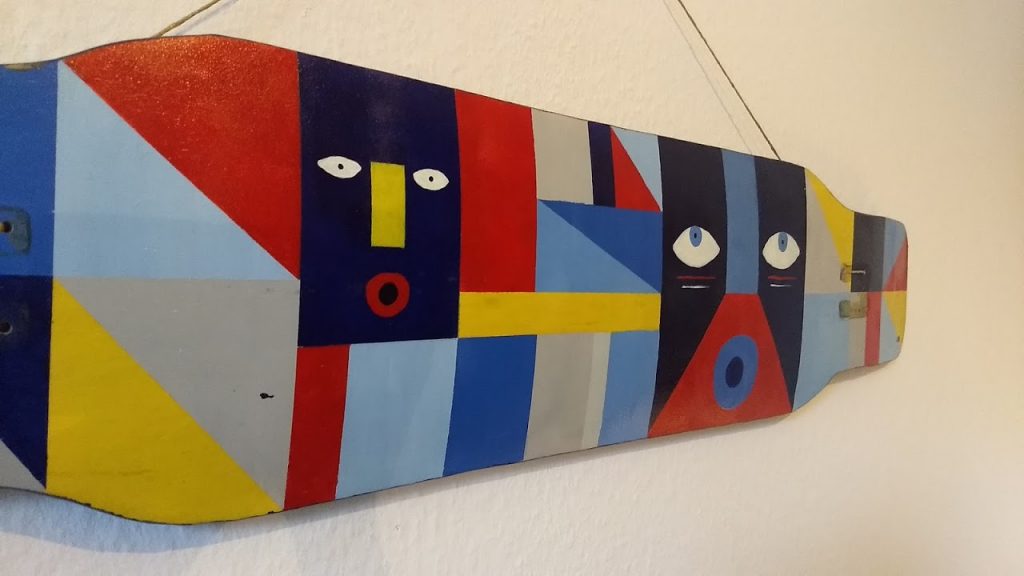
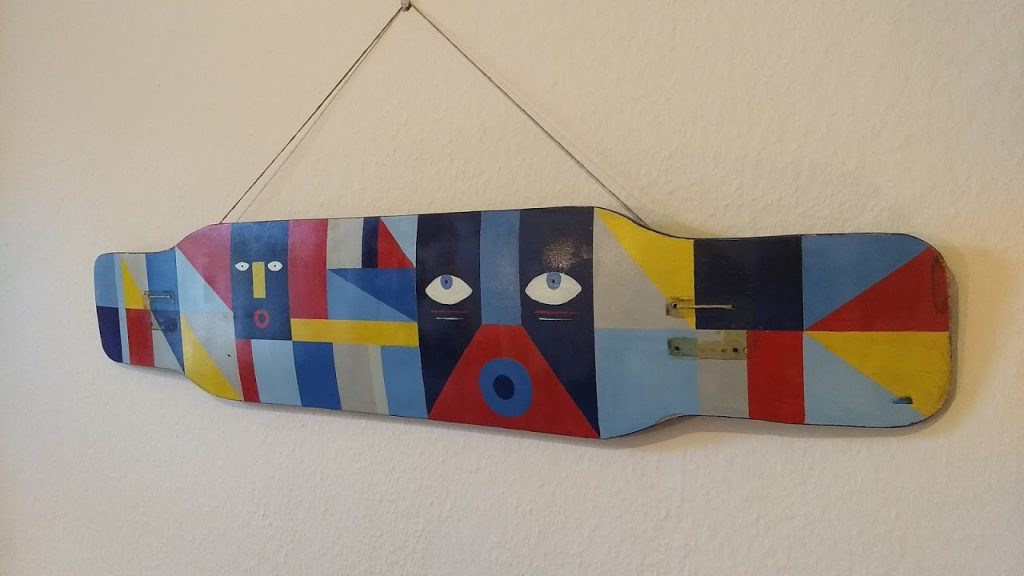
I’m 30 years old from a small town in the south of Brazil but have been living in Germany since 2012. I like skateboards since I can remember and got my first one when I was around 10 years old. It wasn’t really a great setup with it’s plasticky wheels and rubber bushings, but I learned how to comfortably cruise with it. When I was around 13 I got my first real skateboard and started learning some tricks. I was riding regularly for about 2 years, then on and off until 2012 when I moved to Germany. In 2014 I got my first longboard, which I used to cruise around and commute, but also learned a few dance steps. About a year later I bought a proper dancer, then a mini cruiser, then a downhill deck and so on.
By the end of 2015 I built my first deck, I really enjoyed the building process and the feeling of riding a self-made board, so I started looking more into it and found out about Roarockit.
Shortly after I got a TAP kit, better tools and built a couple more decks, which were not perfect, but already much better than the first one. Now my main project is a downhill deck for myself and the crew I’m part of (we are Draft Train Media on Instagram and Youtube). I also have my personal Youtube channel with some skate videos, where I also plan to post the production process of my next decks.
I have the dream to make deck building (and woodworking in general) a way of living, but there’s still a very long way until I get to a level of product quality and design that is commercially viable, so for now I keep it as a hobby, improving on every deck I make.
– Have you recently started woodworking?
Yes and no. In my childhood and teenage years I helped my dad build some simple stuff out of wood, like a small house for our dog, and with some friends a small ramp and a grinding box for street skating. The first deck I built was with hardware store plywood and a heavily improvised press with whatever heavy stuff I could find to bend it. It wasn’t pretty, but it’s still very rideable.
– What is your relationship with Canadian Maple veneer? Why is it so special to you?
It’s actually a love-hate relationship. It’s a fantastic material to work with, I can bend it relatively easily and the deck I’ve built with it feels very solid. Problem is, it’s a difficult material to find where I live and a bit more expensive than I would like, so that still holds me back. Right now my plan is to use cheaper hardware store plywood for prototyping then when I achieve the results I’m satisfied with, get a batch of Canadian Maple veneer to make higher quality decks.
– How did you find out about Roarockit and why did you choose a TAP system instead of another kind of press?
The first time I read about Roarockit was at diyskate.com. I was looking for information about how to build a press and came across the Roarockit TAP, which was a surprise as I had never heard of deck pressing with a vacuum bag. I don’t have a lot of storage space or a workshop, I make the builds either on my apartment’s balcony or in the building’s backyard, so being able to fold and store my press in a shelf made all the difference, which is something I wouldn’t be able to do with a bottle jack press for example. The usage is very simple, making a mold out of hard foam is much easier and cheaper than wood or concrete, which is nice for amateur builders as myself, and if you take your time to do it right, the results are outstanding for such a simple deck-pressing method. The tutorial videos on Roarockit’s Youtube channel are also excellent and helped me avoid many mistakes.
– You wrote an excellent article of your experience with our kit. You can read the article here. It’s a really good one thank you! What is your relation with blogging and the website LongboardEnvy? And why write an article about Roarockit?
I’ve actually never had a Blog myself. The opportunity to write for Longboard Envy came after I posted on /r/longboarding a short review on the Ronin Cast Katana trucks I had recently bought. I couldn’t find any reviews on it so I decided to share my experience with them with the community, then JC from Longboard Envy contacted me inviting for a guest post with a bit more in depth analysis of those trucks. Some time after that, he invited me to write on an ongoing basis and I joined.
The idea of writing about the Roarockit TAP bag kit came from both the need of original content for Longboard Envy and some tips and details about using it that I gathered by reading articles about it, watching tutorial videos and my personal experience designing and building a deck. I wanted to put it all together in one place to help first builders get a good idea of the whole process.
– What are you working on now? And what are your future projects?
Right now I’m sketching some ideas for boards I want to build for the next season. One of them is a 1960’s style, flat, solid wood board. I really like how they look and I want to learn how to stain wood. I want to learn how to apply fiberglass and carbon fiber in order to build a light but super stiff downhill deck and I have a couple of waiting orders from friends for a cruiser and a slalom deck.
– Any comments or special thanks?
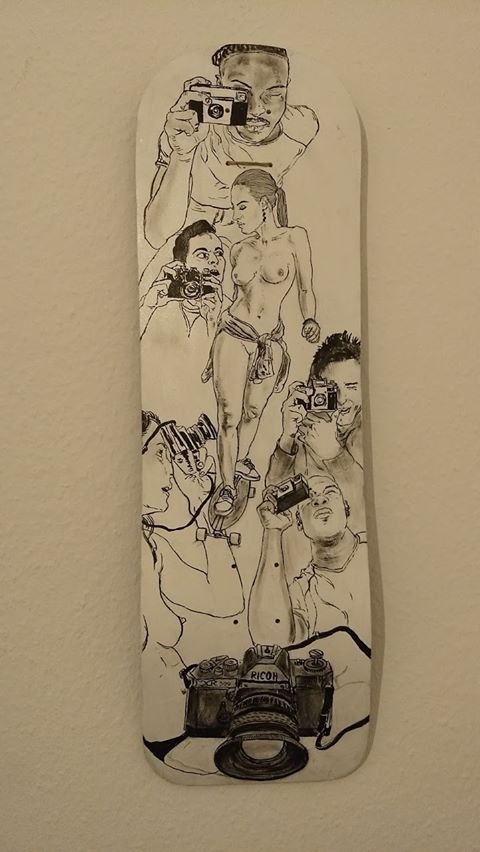
Thank you Roarockit for inviting me to be part of Shaper of the Month and for making it’s products available in Europe, to my friends who support me in deck building, specially Kim and Roberto who painted the amazing custom art on my decks, and the longboarding community on Reddit who is really helpful as well.
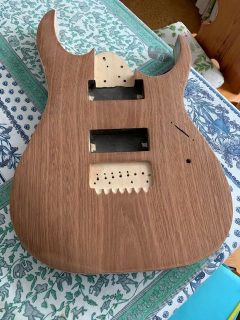
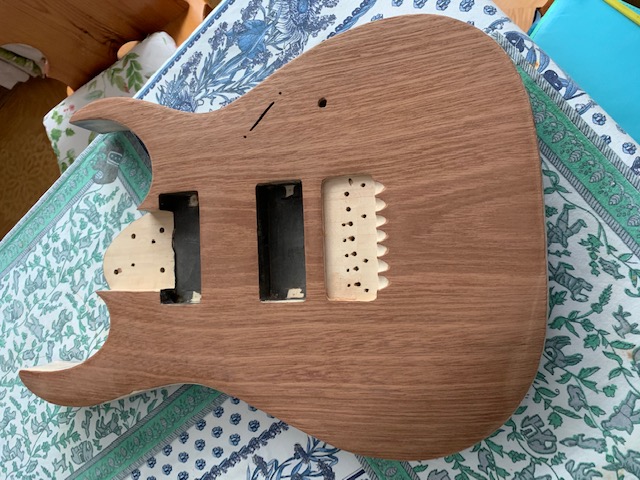
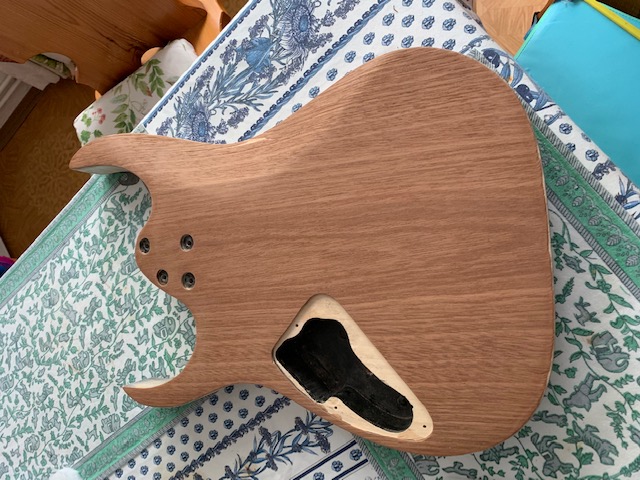
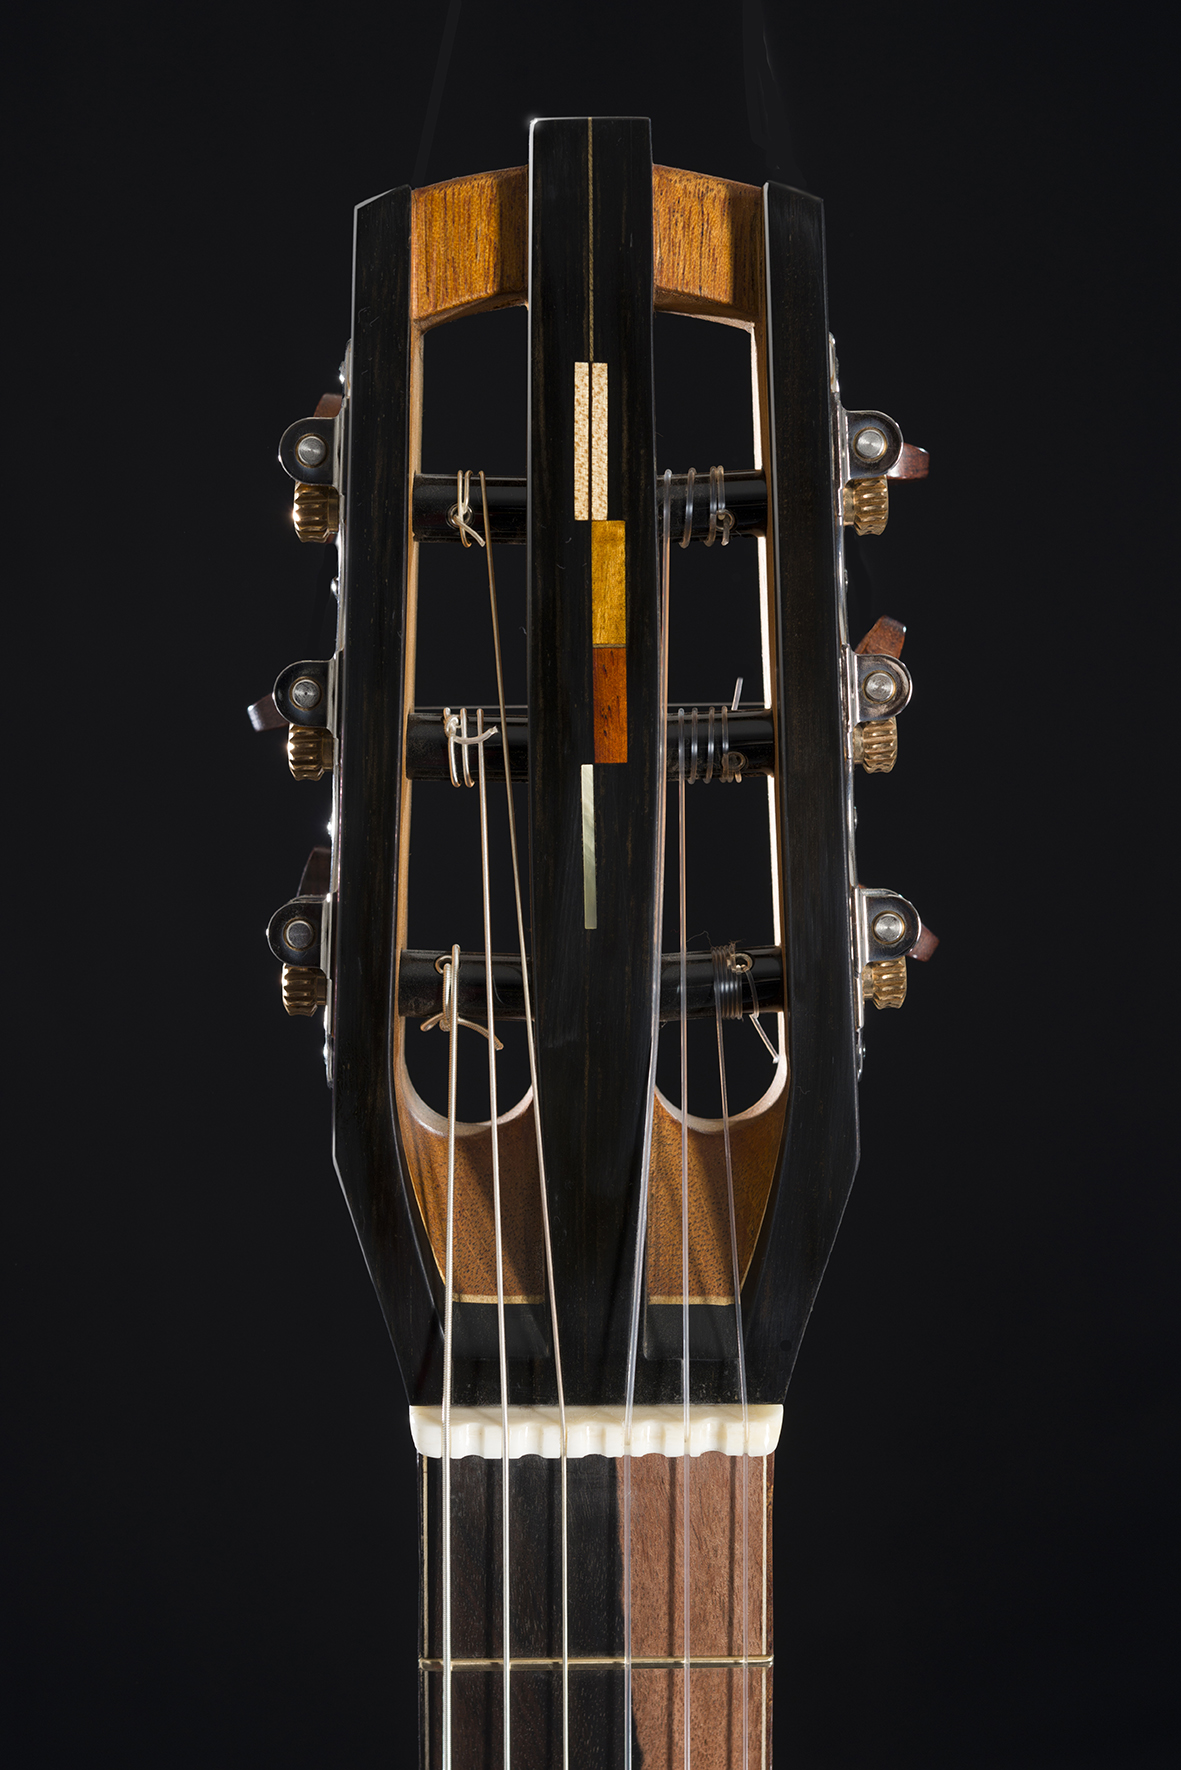
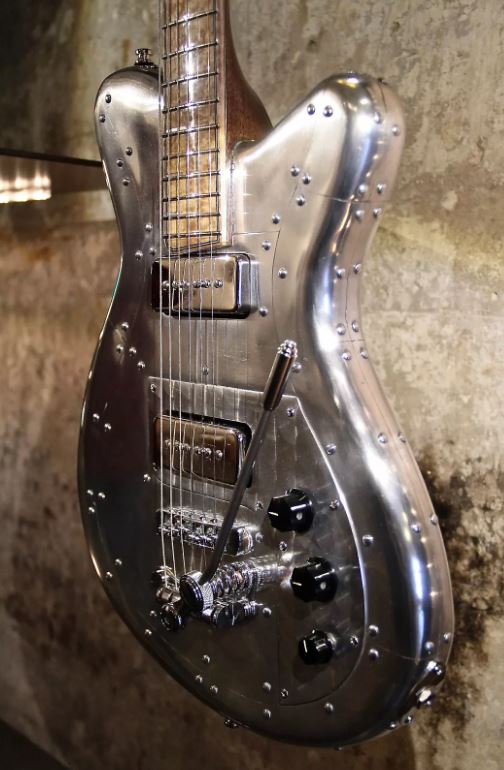
I’m Kris and what you’re looking at is an Ibanez GRG7221 body with a Khaya veneer applied using the Roarockit Luthier press kit.
I play guitar and I always wanted to try a couple of ideas so I bought a ‘pre-owned’ budget instrument that a) I would not hesitate to tinker with, b) would not regret if things go wrong, c) I would be comfortable playing if everything goes according to plan.
After watching a crapload of luthier videos (esp. Crimson Guitars and Will’s Easy Guitar channels), I decided to take it to another level. I bought some veneer (thanks to the Wood Veneer Hub for advice and arranging shipping), glue, and went searching for a vacuum press. After a while, I discovered Roarockit Skateboard and thought… OK, if that press is strong enough to bend seven layers of Canadian maple into shape, it must be enough to cold press veneer onto a guitar body. So I ordered one.
And… it worked!
Let me share a couple of dos and don’ts so you avoid mistakes that I made.
Flip the bag upside-down.
You may need to use a small rubber roller to get the air bubbles out, especially on guitars that do not have flat bodies. You can’t do that with the valve and the net on top of your project.
To support the upside-down bag, I used a box from an LCD monitor with a hole cut in the middle for the valve.
Use flat support for the guitar body – a thin MDF would do
This will help with stability when you are putting the guitar in the bag. There’s not too much space left and with an MDF board, it would be like putting the guitar inside on a tray. You may fix the body to the plank using a double sided tape
Round the edges of the plank – I used a router but some quick sanding or rasping would do too
Fill in the cavities
Typically, you cut out the holes for pickup cavities in the veneer after application. However, veneer will crack around sharp and deep edges under pressure and some cracks might extend to the actual body area. I used foam that usually comes in boxes with electronics – cut to size to fill up pickup cavities, the neck joint and the electronics cavity on the backside. Ensure the foam does not protrude but it doesn’t have to be leveled, I went with about 3 mm below the surface.
I also constructed a large counterpiece to fit in the space around the horns. I actually punctured one Roarockit bag on the sharp pointy end of one of the horns. Having something in between the horns will not affect the pressure in the areas where you need it, but will ease/prevent the bending of the bag over critical areas. That ugly thing that you see is a crudely shaped polystyrene block wrapped in a packing tape. Crude but effective.
Cut the veneer as close to the shape as possible
You may end up with ugly veneer patches glued to the sides of the guitar. You can get rid of them (using a scalpel knife, roller sander etc) but it’s an extra effort and not an easy one
Or you’ll be left with bits and pieces cracking and sticking out, then cracking under increasing pressure. Those cracks can spread to where you don’t want them to be.
Use a vacuum cleaner in the initial phase of the operation
This is important especially on guitars with curved surface (or that belly cut-out on superstrats).
Veneer will bend – but the longer it takes, the higher the chance it will crack and that the splinter will move from its original location. It happened to me. Had I used a hoover, the veneer would have still cracked as the cutout is huge and deep, but it would not have moved 30 degrees off – quick depressurization would keep it in place.
Back of guitar
Go slow, think things through, and then slow down further. And have fun :)s
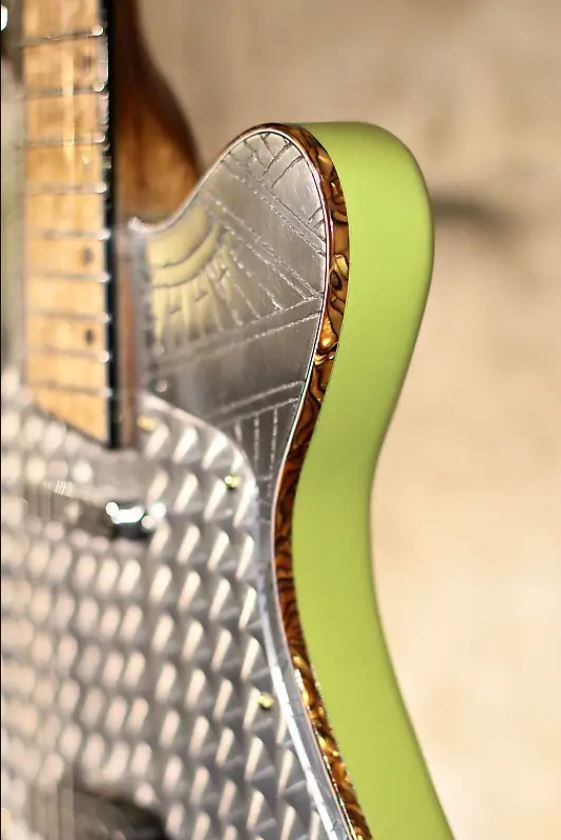
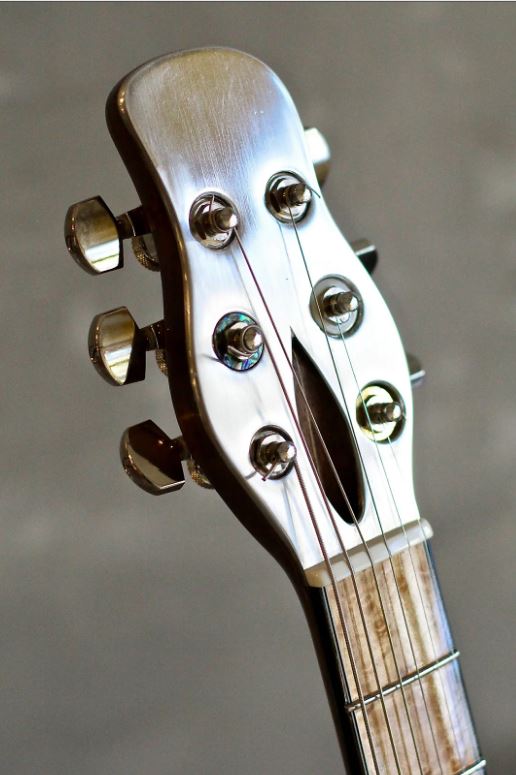
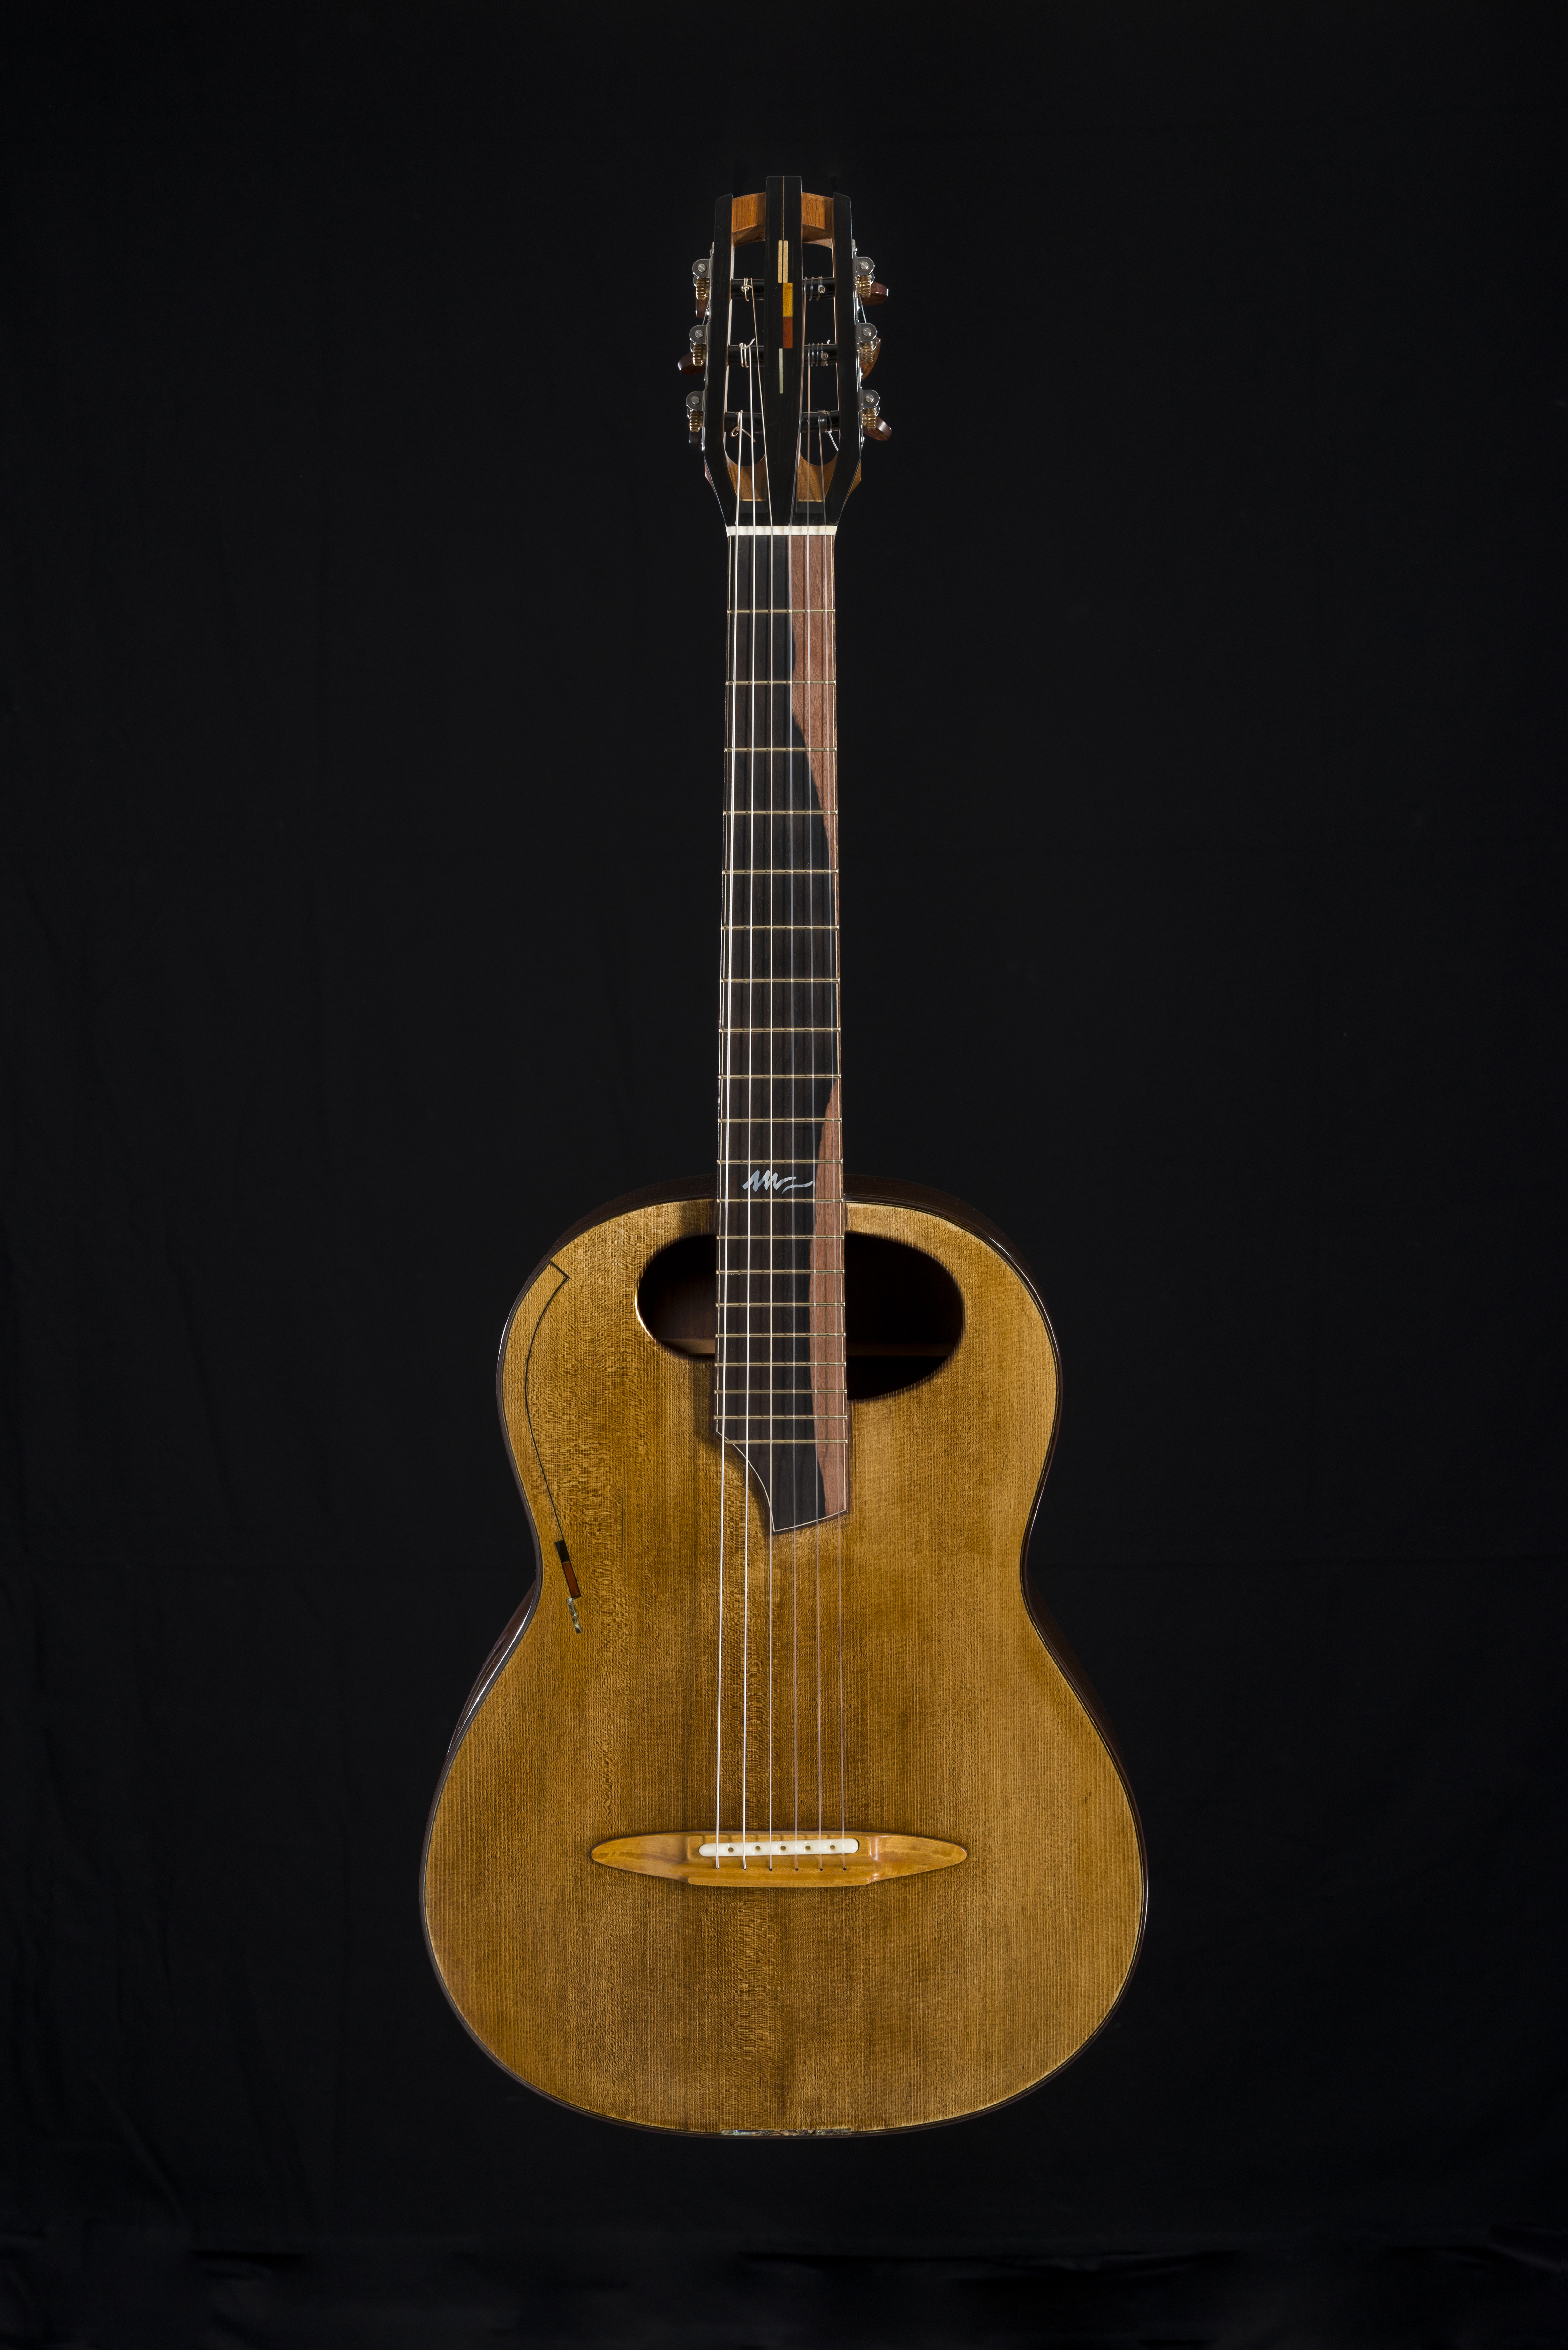
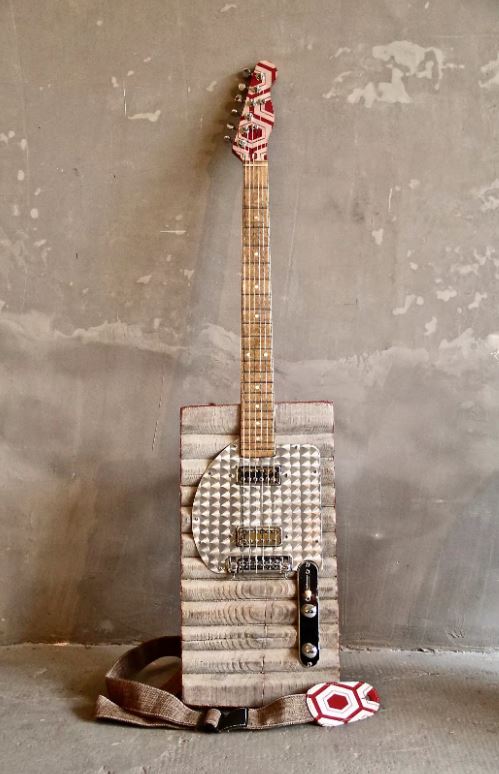
Nous continuons notre tour du monde incroyable des Shaper Roarockit. Et comme vous le savez, nos kits ne servent pas qu’à fabriquer des skate. Alors après avoir découvert Aled sur notre page instagram , fabricant de stylos avec nos chutes de matières premières, c’est au tour de MojoBoxGuitars alias Pierre Marc Martelli qui utilise la technologie Roarockit pour fabriquer des guitares absolument sublimes. Nous vous souhaitons une belle découverte 🙂
Commençons par une présentation de notre “Shaper of the month”. D’où viens-tu ? Quel âge as-tu ? Que fais-tu dans la vie ? Tes passions ?
J’ai 56 ans. Je suis méditerranéen et mes racines sont ici, même si j’ai passé mon enfance en région parisienne. La lutherie est ma seconde vie professionnelle, car j’ai travaillé pendant une trentaine d’années dans le Design graphique et l’illustration. J’ai commencé par bricoler mes propres guitares, puis celles des copains, puis j’ai construit une Archtop Jazz – un peu le summum de la lutherie guitare : une révélation ! J’étais complètement envoûté : je ne pensais plus qu’à ça, au bois, au son, aux formes… Ça ne m’a jamais quitté, je m’endors en pensant Guitare et j’y pense toute la journée ! J’ai réalisé un rêve, avec le sentiment que tout ce que j’ai fait précédemment n’était que le préambule d’aujourd’hui. Bref, c’est le pied…
Depuis combien de temps as-tu commencé le travail du bois ? Connais-tu ce savoir-faire depuis longtemps ?
Je ne connaissais quasiment rien au bois avant de me passionner pour la lutherie, mais c’est une matière avec laquelle j’ai été instantanément en connexion. Travailler le bois ne m’a jamais semblé compliqué – même s’il faut savoir apprivoiser certaines essences. Maintenant, il m’arrive fréquemment de regarder un arbre ou un meuble en y voyant les guitares qu’il contient ! Et j’ai plaisir à retrouver certains arbres comme on retrouve de vieux copains.
Comment en es-tu arrivé à fabriquer des guitares ?
Pour être luthier, il faut à mon avis trois qualités : aimer la musique, aimer le bois et aimer les musiciens. C’était mon cas. La lutherie m’a aussi enseigné quelques vertus comme la patience, l’écoute (du client guitariste) ou encore l’humilité face aux inévitables erreurs, car je ne connais pas d’artisan qui n’en fait pas, il y a tellement de compétences à maîtriser. Construire des instruments est complexe, incertain, parfois frustrant. Mais la plupart du temps, c’est puissamment gratifiant ! Aujourd’hui, je ne vois vraiment pas ce que pourrais faire d’autre…
Quel sorte de bois utilises-tu pour fabriquer tes guitares ?
On distingue les bois de la lutherie acoustique et ceux de la lutherie électrique. Mais ils ont en commun d’être des bois de « raisonnance » : Les épicéas, Red Cedar, palissandre, acajou, ébène sont des bois traditionnellement utilisés dans la lutherie acoustique. Le frêne, le tilleul, le noyer, l’érable sont davantage choisis pour les électriques, car il faut combiner leurs qualités acoustiques et mécaniques. Mais je cherche sans cesse de nouvelles essences à essayer… Ou d’autres matériaux.
Comment as-tu choisi le nom “MojoBoxGuitars” ? A-t-il une signification particulière ? Une histoire ?
Ahh, bonne question ! Le Mojo est une qualité et… Un truc intraduisible ! Le Mojo est au musicien ce que le Groove ou le Swing sont à la musique : une énergie, un feeling qu’il FAUT avoir sinon c’est pas la peine ! Comme je suis un grand fan de Blues, il était certain qu’il me fallait du Mojo… La Box, c’est le nom que JB Lenoir – un immense Bluesman – donnait à sa guitare (écoutez I Feel So Good). Un jour j’ai fait un + un et j’ai trouvé Mojo Box Guitars, des « boîtes à Mojo » : l’objectif de toutes mes grattes !
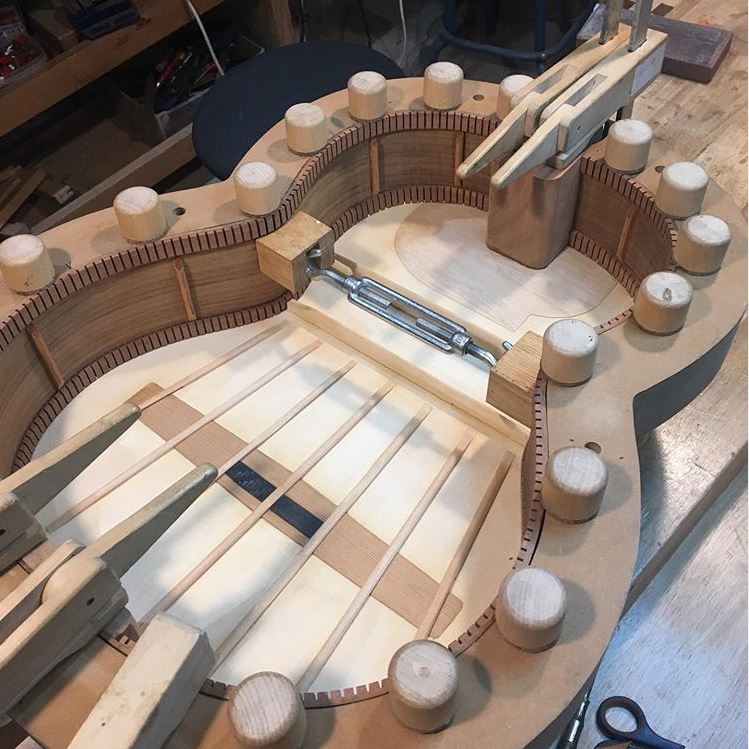
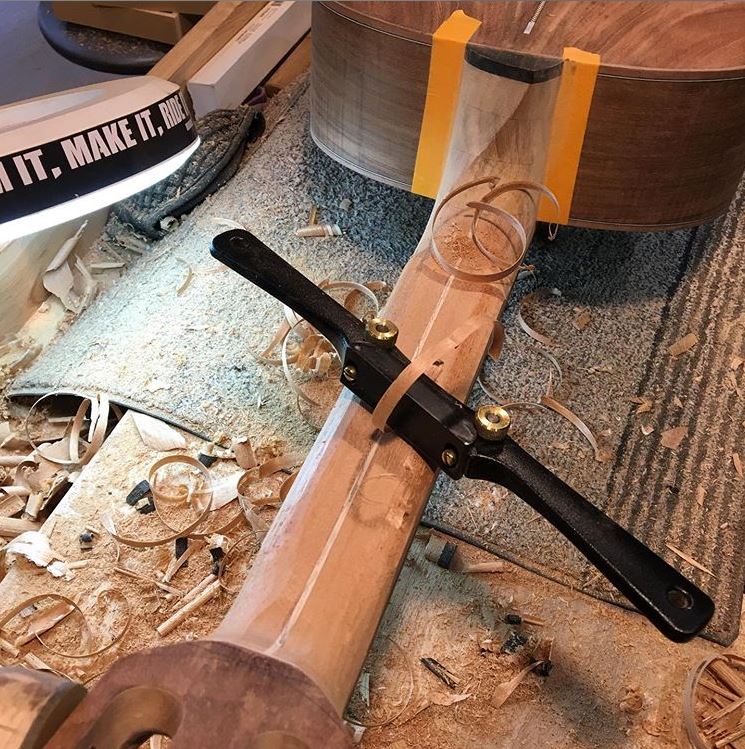
Utilises-tu les technologies Roarockit ? Te sont-elles utiles au quotidien ?
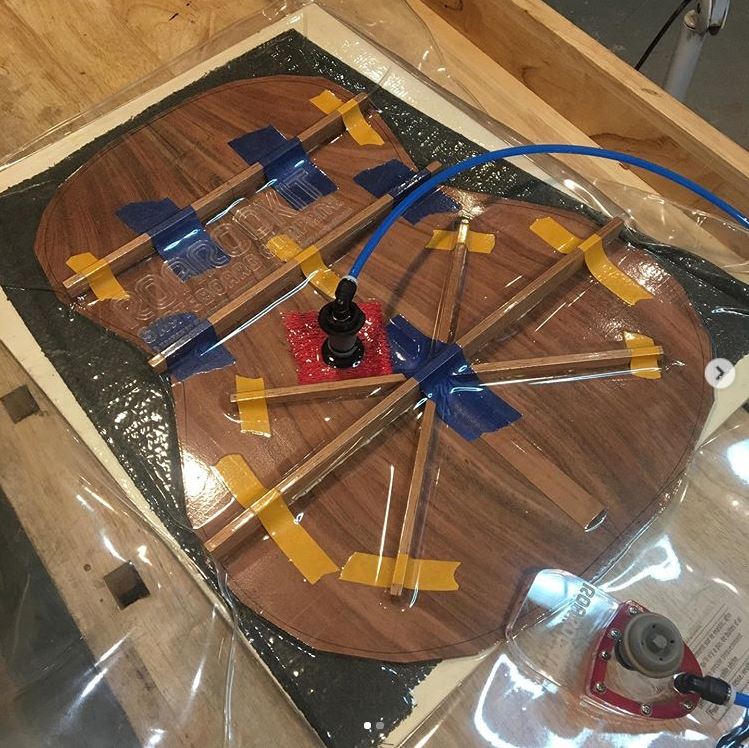
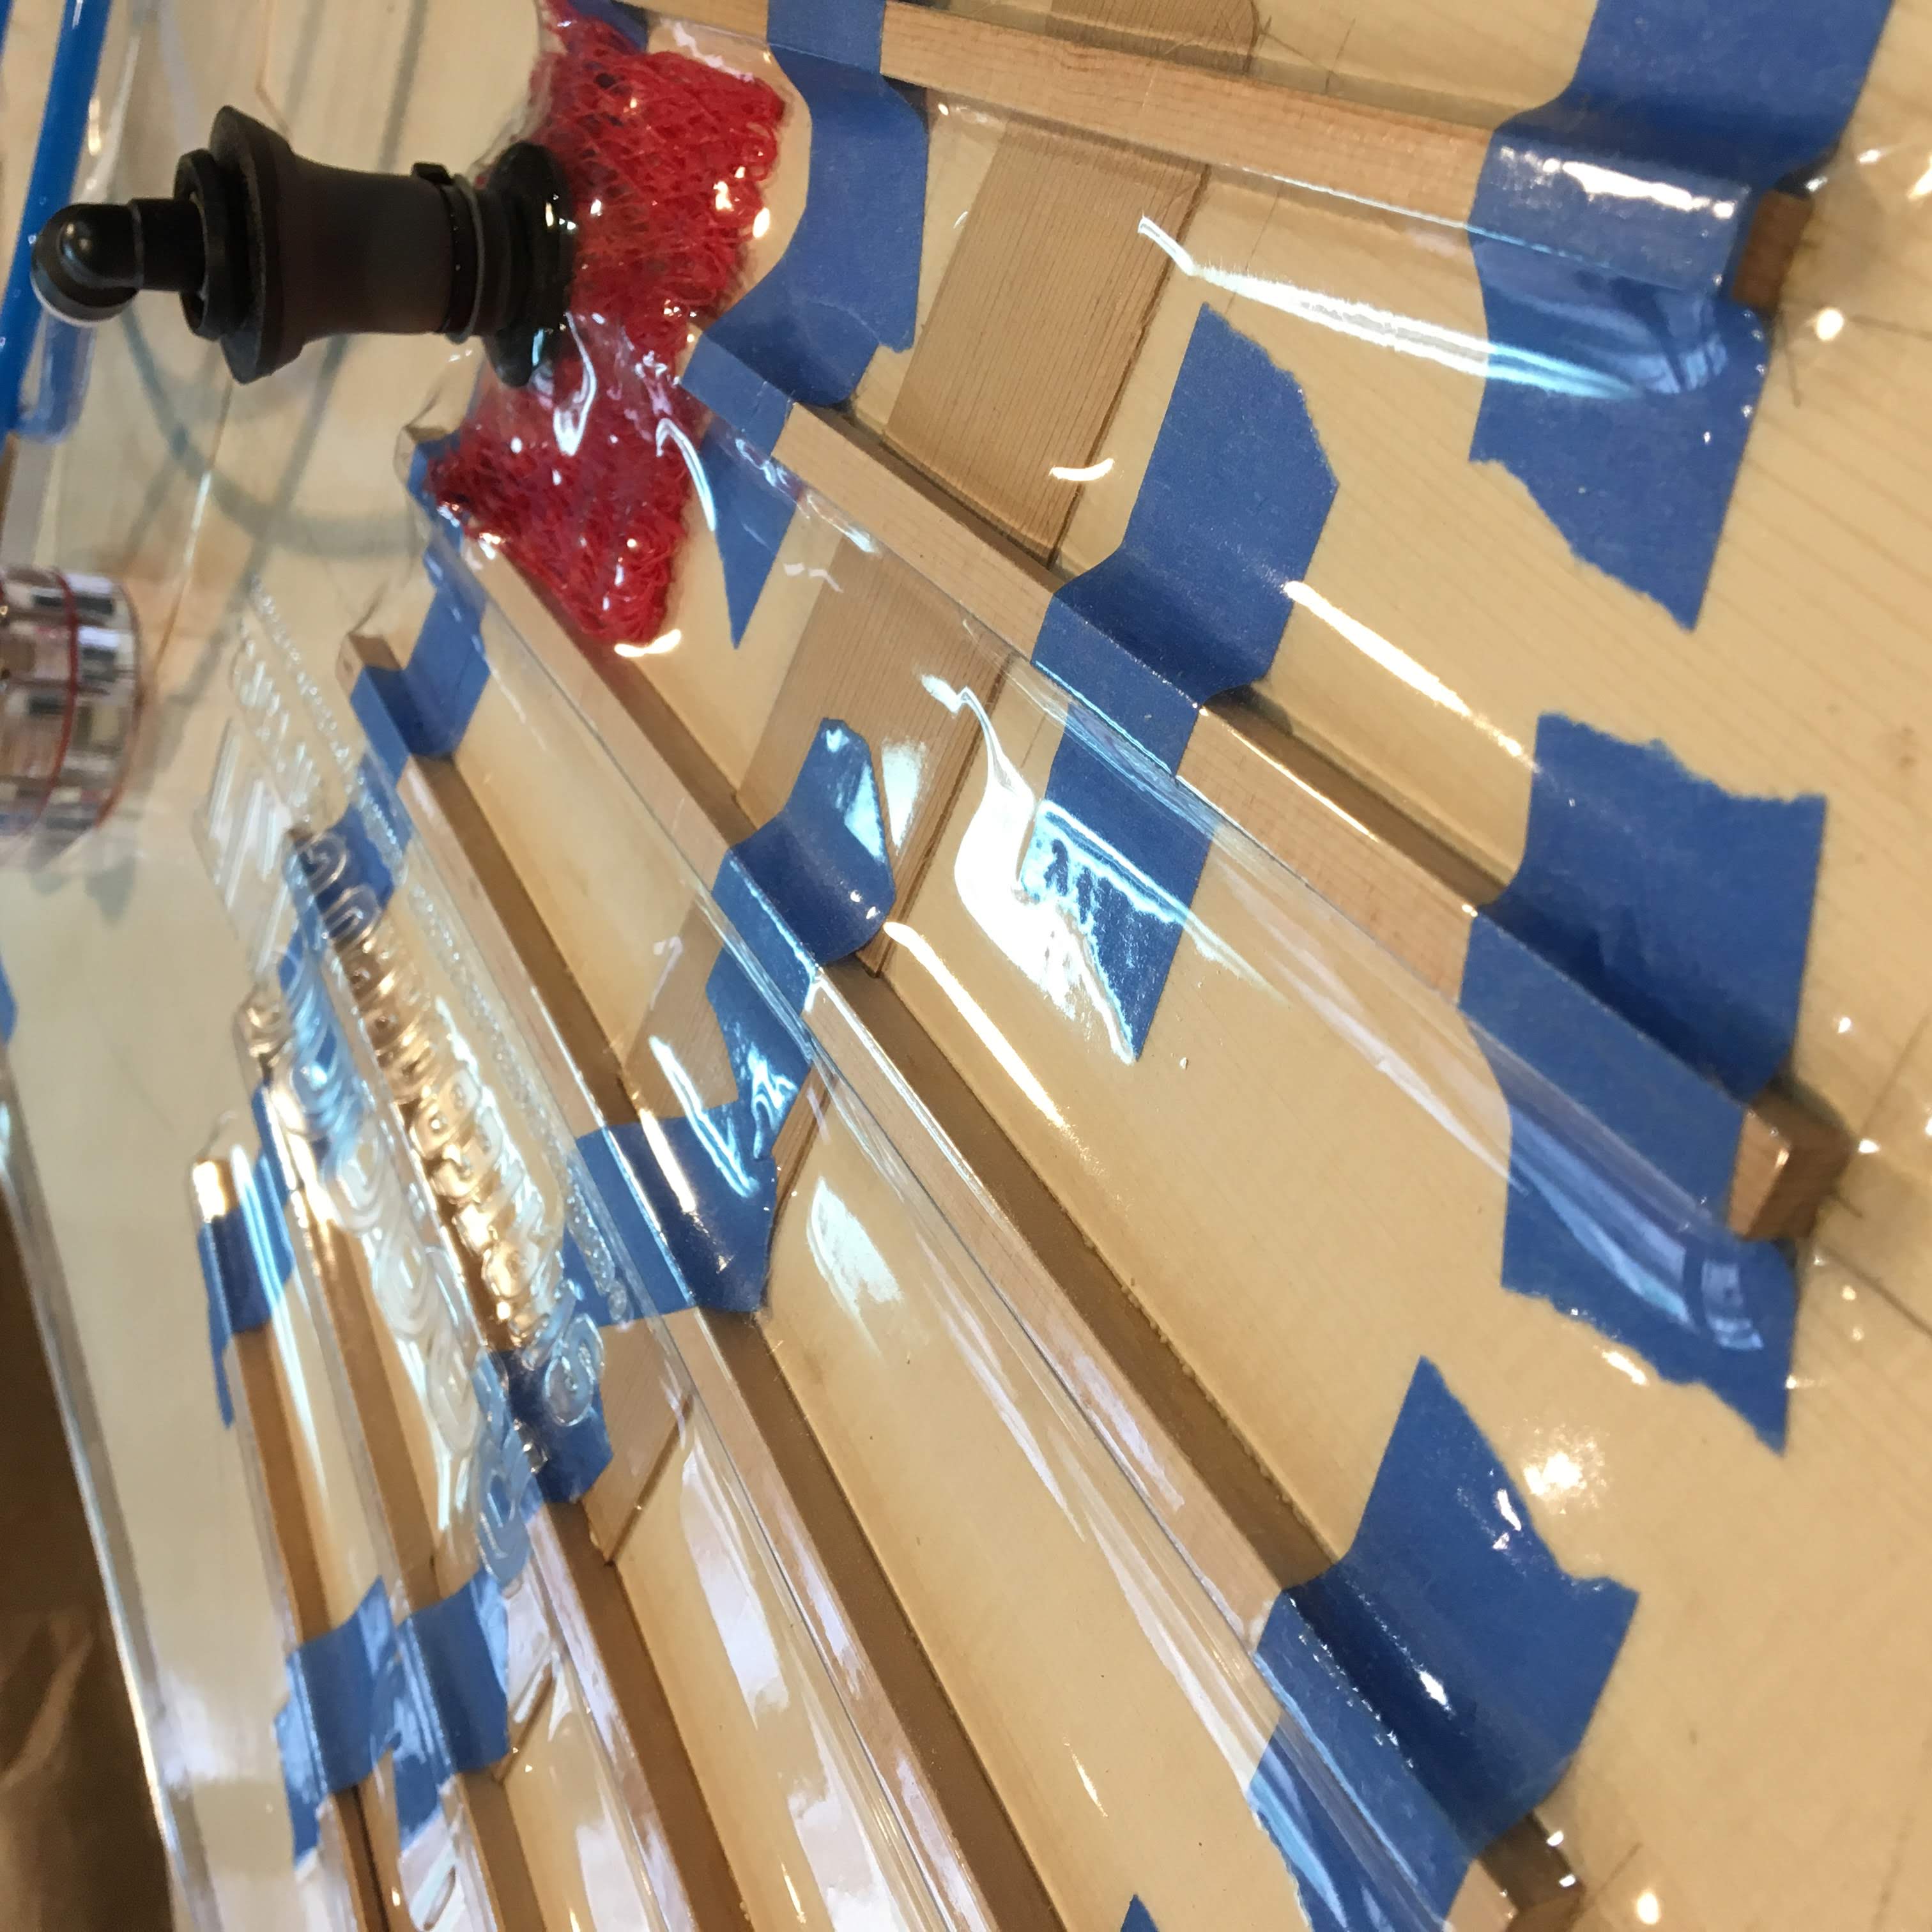
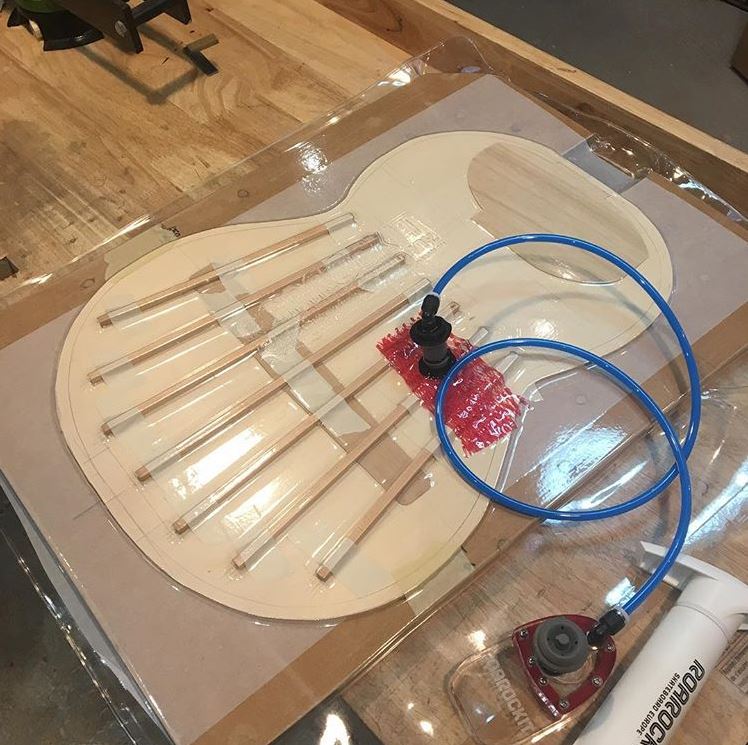
J’utilise un kit Thin Air Press TAP 26 et je peux dire sans exagérer que ça change ma vie ! Les collages, en lutherie, sont souvent précis, d’accès complexes, sur des formes compliquée. On doit coller des pièces fragiles (les barrages, par exemple) sur d’autres pièces délicates : coller sous vide permet d’optimiser les pressions à exercer tout en gérant des galbes et des épaisseurs différentes. Idem pour le collage de plaquages de bois sur des formes torturées, par exemple.
Tout ça avec une poche sous vide une simple pompe manuelle : je tire mon chapeau aux concepteurs et je leur dis : merci les gars !
En cherchant sur Internet ce type d’équipement, généralement beaucoup plus lourd et cher…
Sur quoi travailles-tu en ce moment ? Quels sont tes futurs projets ?
J’ai toujours au moins une guitare en chantier, en ce moment une solidbody avec des essences inhabituelles (du Polownia et du Tamarin, entre autres). J’ai également mis au point un modèle acoustique Cross-over à cordes nylon dont la particularité est d’être proposé à un tarif compressé, sous une barre symbolique de 2 000 €, ce qui est peu pour une guitare d’artisan fabriquée comme ses grandes sœurs qui coûtent au moins le double… Cette approche, très militante, qui vise à « démocratiser » la lutherie artisanale me tient beaucoup à cœur.
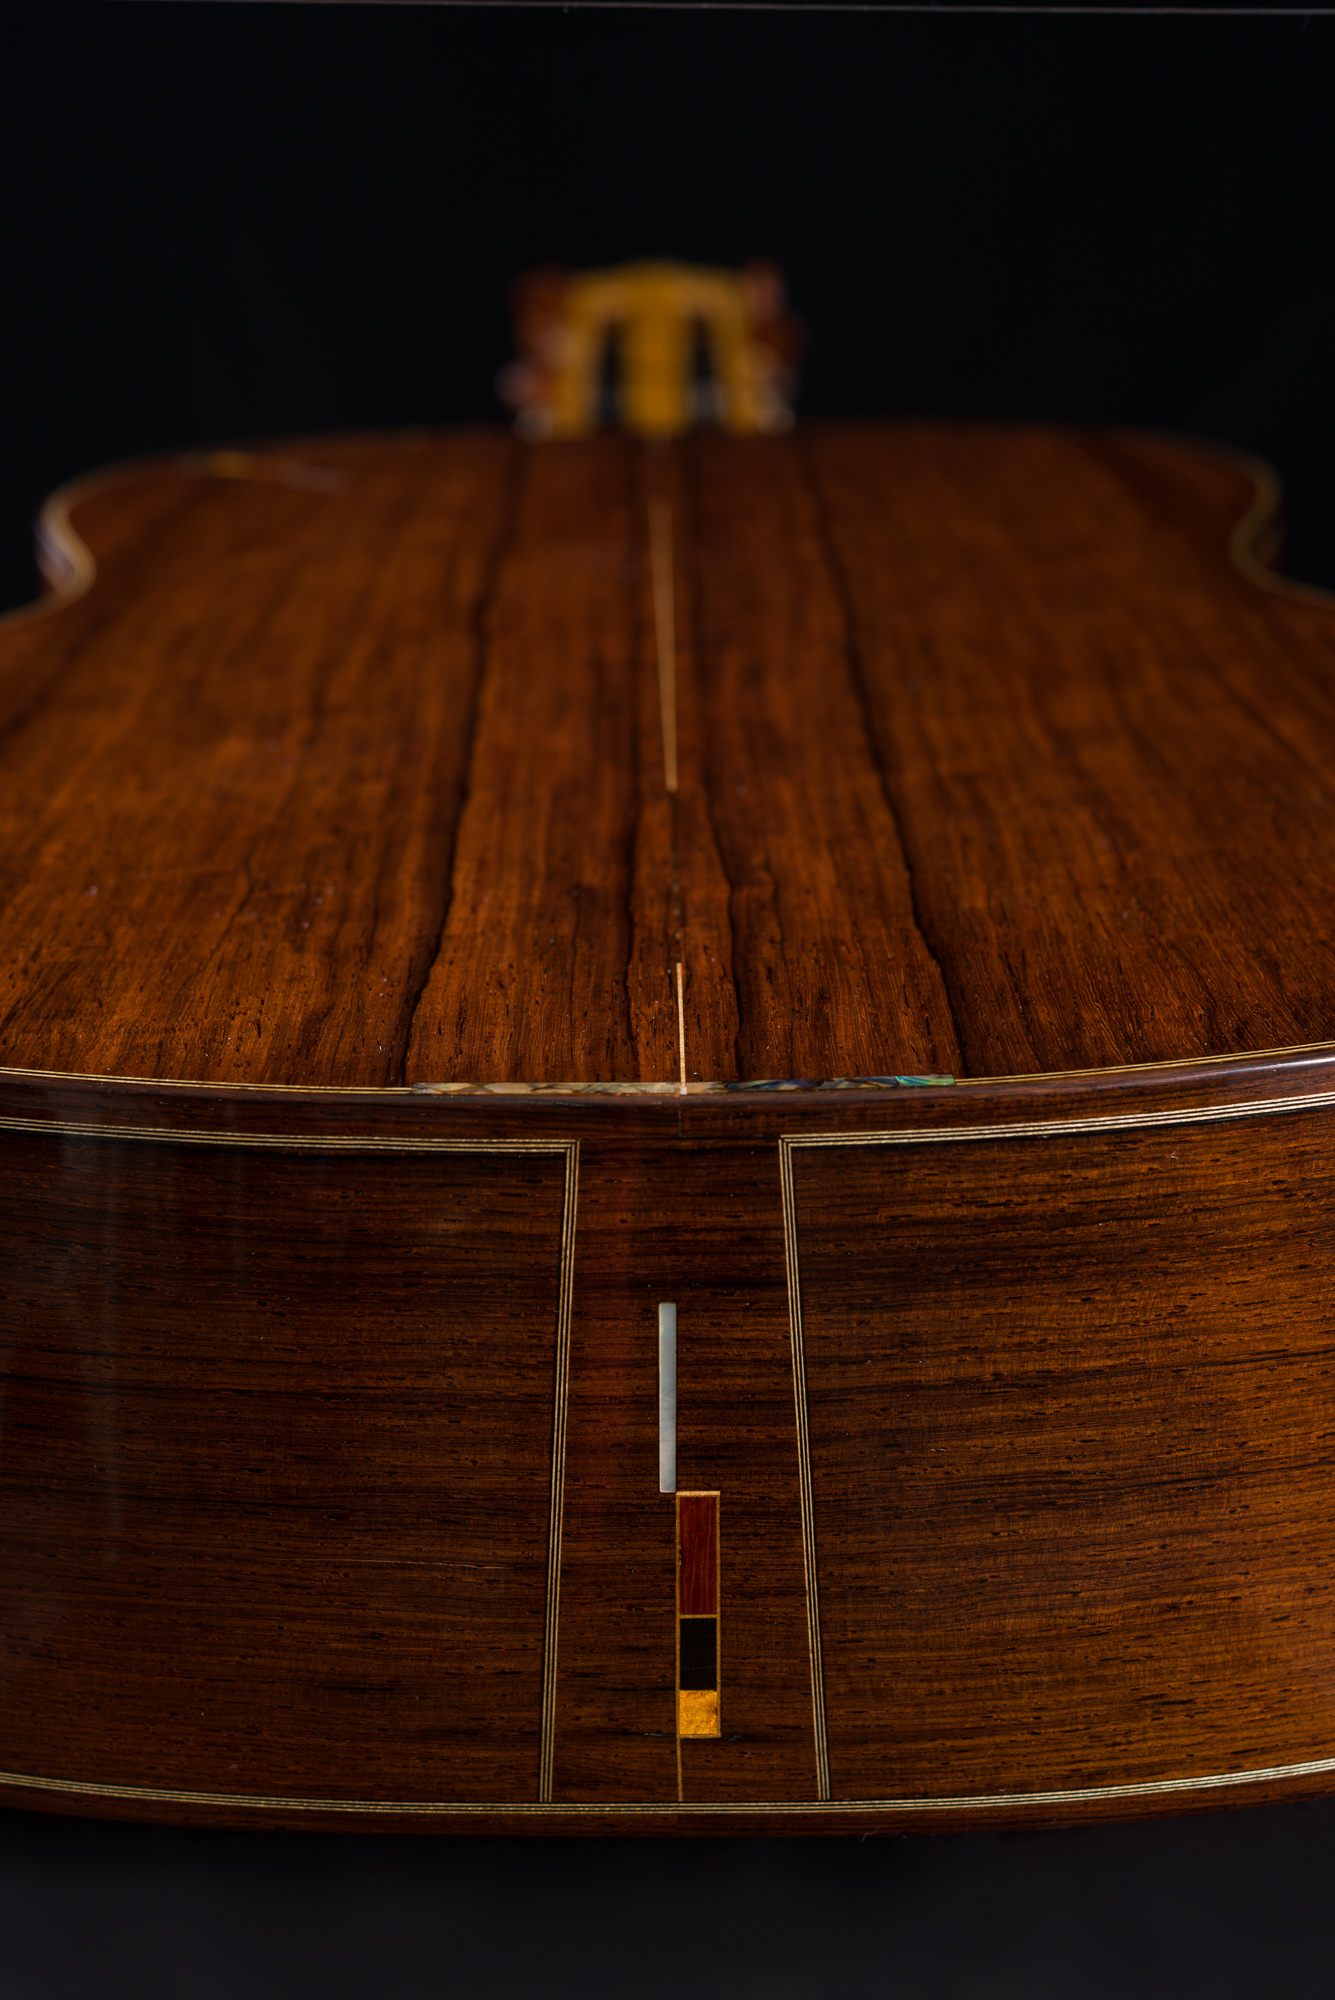
Au titre des projets, il y a aussi la volonté d’introduire le plus possible des essences de bois locaux comme alternative aux essences tropicales qui deviennent chères et compliquées à utiliser du fait d’une législation très restrictive. Une approche partagée par de nombreux luthiers Français.
Ou peut-on te trouver ? (physiquement si as une boutique ou tous les réseaux web)
Mon atelier est situé dans le centre de Marseille, 27 boulevard de la Corderie, à deux pas du Vieux Port. J’y accueille les guitaristes avec plaisir, également pour les travaux courants de réparation ou de restauration. Je dispose également d’une boutique Reverb, d’un compte instagram et d’une page Pro Facebook. Un site Web est en chantier… Depuis 2 ans ! Ouais, je sais…
Un dernier commentaire ou une spéciale dédicace ? Vas-y c’est ton moment
Eh bien, même si c’est pas trop mon genre, je vais faire une spéciale dédicace à… Moi-même ! Pour avoir eu le cran de quitter, à plus de 50 balais, un job où je gagnais bien ma vie et de tout investir dans une passion qui est devenue mon métier. Avec les incertitudes et les doutes, les cahots financiers, les heures passées sans compter à l’établi, souvent 7 jours sur 7. Pour avoir acquis ces compétences seule, en me relevant tant de fois après m’être cassé la gueule. Pour tout ça, et pour plein d’autres raisons – je dis : bien joué, mec ! ;=)
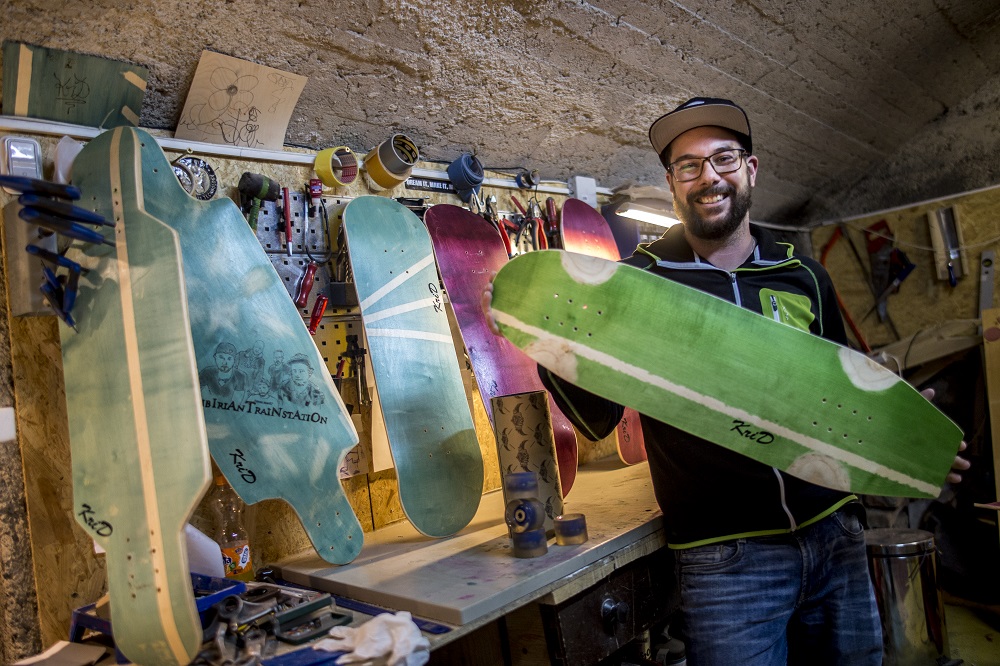
Daniel contacted us a few weeks ago with pictures of his builds and what he was up to! We loved his decks and couldn’t resist putting forward his project that has gone from a winter hobby to a passion and small board building line. Give it up to this board builder in Austria!
1) So Daniel, can you tell us a little about yourself, where do you come from ? Where do you currently live ? What do you do ?
My name is Daniel Krismer, age 31, since I was born, I live in Kufstein, that’s a nice small town in Tirol/Austria. I’m married and proud daddy of 2 lovely kids. I love to ride motorcycles and play guitar. I was skating for fun since I was a little boy, trying new tricks with my friends at the park, now I enjoy more cruising around than doing tricks.
2) We understand you have recently started building skateboards, how did this come about ? Any particular reasons ?
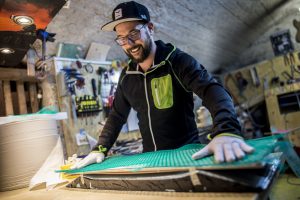
I love to work in my workshop, no matter what to do, to fix something or rebuild an old motorcycle. Last autumn I kept an eye out for a new winter project. With my motorcycle students, I spend a lot of time on the parking lot to do some basic excercises. To get throw the exercises I use a skateboard, a 10 year old 7,5 Minilogo with independent trucks and monster wheels. After a thousand scratches and a realy bad griptape, I decided that it´s time for a new one. I surfed the internet and then ….from Skateshop – to google diy skateboard … and 5 hours later .. I had a new winter project.
3) You have launched a facebook page for « KriD Strassenbretter » (@skateboards4fun), can you tell us about it and how it is going so far ?
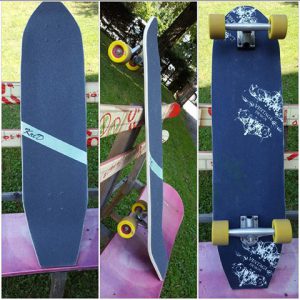
Last November I pressed the first decks, and the results were wow. I´d never thought that I could build a skateboard like that. It´s currently a great hobby, I can do it alongside my family, when my kids go to bed, I go to my workshop. A few month ago I decided to publicise my boards. Therefore facebook is the perfect platform. It’s not my goal to earn livelihood, but to create a customized skateboard is really cool, but I cannot use so many boards on my own, so I decided to sell them. The feedback is great and the feedback is motivation to go on.
4) You use the Roarockit Thin air press to build your decks, how did you come across us and how do you find it so far ?
A friend of mine builds skis and he presses also with a vacuum press. I searched online for vacuum bags and alternatives. After a few hours of reaserch I found your homepage. And the first order was done. I only use your thin air press. I like it to build my own molds and go to the timberdealer to look after the right veneer. Usually I use european maple and ash. Your vacuum bags are amazing. The material is hard-wearing and longlasting. It´s a really great idea to press without an expensive vacuum pump. Thank you for a great product like that.
5) Any future projects or plans with « KriD Strassenbretter » (@skateboards4fun) ?
My next project is to get a straight line throw my boards, find my style. I just start out on my sk8boardbuilder career, « lol ». In addition I have another new project : a powder-surfer . Hopefully I can show you the results in the near futur .
6) Little end note : any favorite saying, special deck or personnal note you would like to add?
It’s amazing, how quickly an idea becomes a passion. I hope that I can build many skateboards in the futur.
You can checkout, follow and buy KriD Strassenbretter boards on facebook !


