How to build a 1″ drop deck
This tutorial shows how to build a 1″ drop deck in one glue-up. The great thing about this deck is it can be built in less than 3 hours (not including the glue drying time).
Materials:
1/16″ maple veneer
Titebond III woodworkers glue
1″ Insulating foam (extruded polystyrene)
3/4″ sheet of plywood
Plastic shelf liner
Tools:
4 wood clamps
2 close-napped 3″ paint rollers
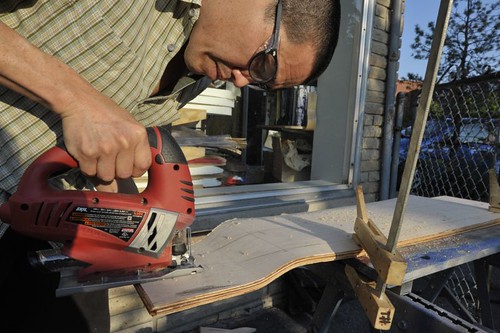
Jig saw
Process
This is an advanced build. If you have not built a skateboard using a vacuum pressing system before, I would advise building a simpler shape like a pintail or build a deck using one of our pre-shaped deck kits.

You can use any sheet of 3/4″ material as a base for your mold. Make sure it is not twisted or bent along its length. MDF, plywood and partical board would all work well. The 3/4″ thickness will prevent the veneers from distorting the foam mold. I used a 12″ wide piece for this mold. You will need to leave at least 8″ of sheet material at either end of the foam mold.
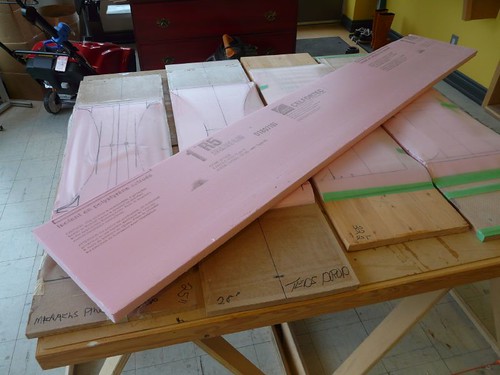
You can buy 1″ extruded polystyrene at most building supply centers. If you live in a warm area of the country, this may be difficult as the material is used for home insulating. If you cannot find it locally, Roarockit sells the material packaged with longboard sized veneers.
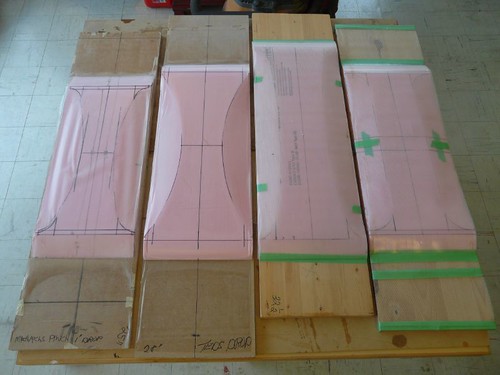
The shape, width, length and concave is up to you. Above are four different examples. They range from 21, 24, 29″ between the drop lengths. The mold on the right is actually adjustable in length with additional add-on pieces that can be inserted into the middle of the mold. (shown with insert)

You will notice all four molds have slightly different concave shapes. Some are curved towards the middle of the decks and some are straight. I prefer the curved concave as I feel it makes the board less flexy towards the middle of the deck and helps prevent the deck bottoming out on turns.
There are a number of ways to shape foam including a hot wire setup. For a drop deck like this it is easiest to use a surform and a block of foam with 100 grit sandpaper glued to one face to shape the mold. For a good tutorial on shaping foam have a look at my “How to shape a foam mold” tutorial.
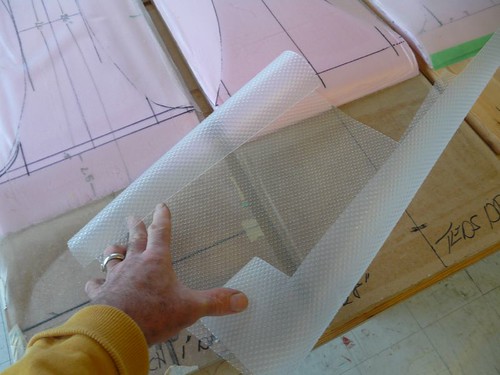
In order to prevent the excess glue from sticking your laminated deck to the mold you need to apply a release ply. I use either a plastic, sticky backed shelf liner or a thicker vinyl sheet taped to the mold top. Both can be bought at hardware stores.
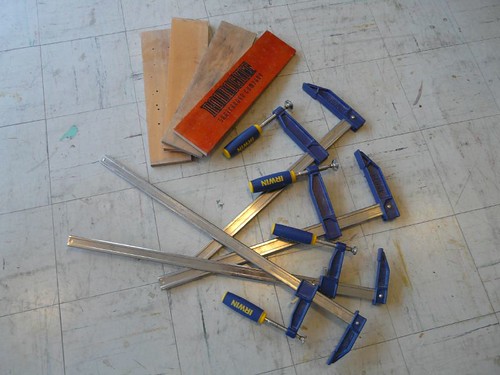
You will also need 4 pieces of plywood 12″ wide by 6 to 8″ long. Also a selection of 4 clamps with as deep a throat as possible. Clamps shown above will work great.
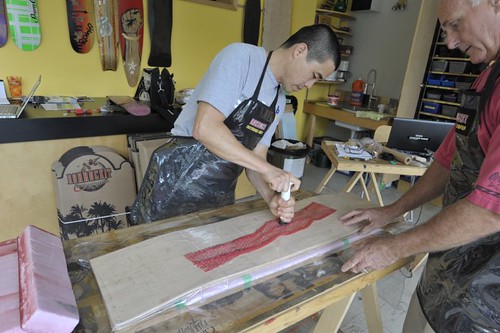
Pre-cut your veneers to the length of your drop board. It is a good idea to add a couple of inches to either end of the board. This will get cut off later when shaping the profile of the deck with a jig saw. It is also a good idea to make your veneers wider that the width of your deck by 1/2 to 1″. This will help if you mis-align your veneers while doing your glue up.
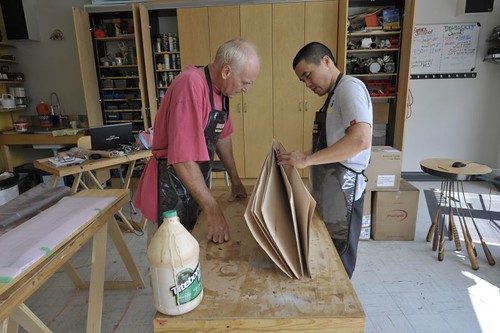
It is important to work with someone while doing the glue up. I recommend 8 layers of 1/16″ maple veneer for a rider weighing less than 180 lbs. 6 long grain and two cross grain layers stacked from the top down to the bottom:
long, long, cross, long, cross, long, long, long
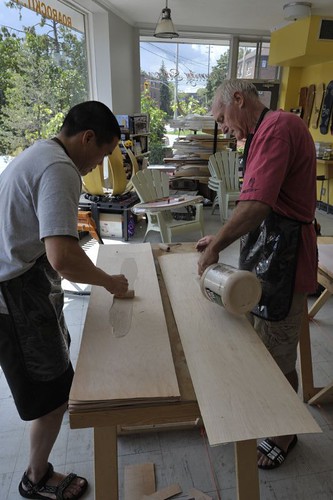
While gluing, apply glue onto both the top and bottom of the sheets. I usually apply a heavier layer on one and just wet out the other with a smaller amount of glue.
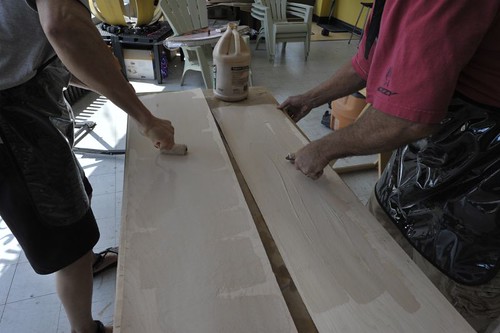
You want to apply an even coat of glue with no build up of excess glue from where you poured it onto the sheet.
Work very quickly when applying the glue. You have less than 9 minutes to get the wet veneers into the bag and pressed. Use Titebond III as it has the longest wet time of any glue presently on the market.
Place your glued veneers onto the mold. Align them so the front and back are equal on the mold. I use elastic bands to hold the veneers in place as shown in the above photo.
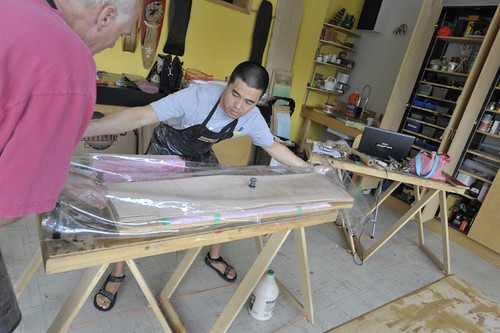
Make sure you have pre-prepared your vacuum bag. There is no time to look for a pump or replace your sealing tape. All this needs to be done before starting your build and have everything at hand before starting.
If you are using our Thin Air Press system place breather netting under your valve. This will prevent the valve from sealing against the veneer while evacuating the air.
Our TAP bags come with a one-way valve where the top cap can be removed so you can vacuum the bulk of the air from the bag (using a vacuum cleaner).
Then evacuate as much air as you can using our manual pump or your electric system.
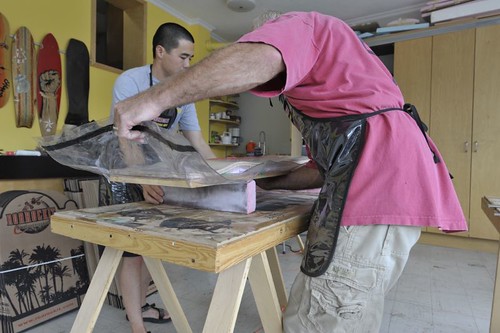
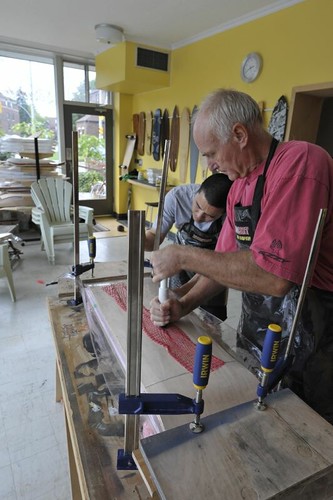
Place your vacuum bag, mold and veneer stack onto a couple of blocks. I am using two pieces of 2″ foam. This allows room to work with your clamps and wood blocks in the next step.
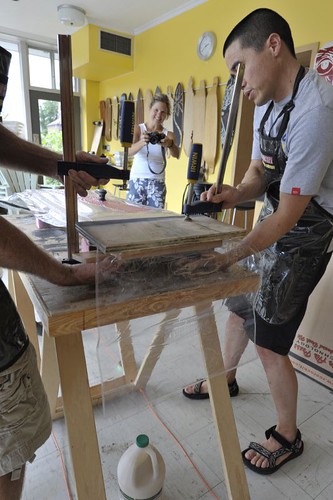

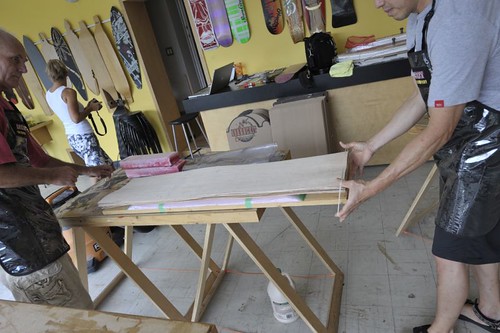
Place pieces of plywood on the top and bottom, aligning the top piece parallel to the trailing edge of the inside foam mold. Using two clamps, clamp as close as possible to the edge of the foam as shown above.
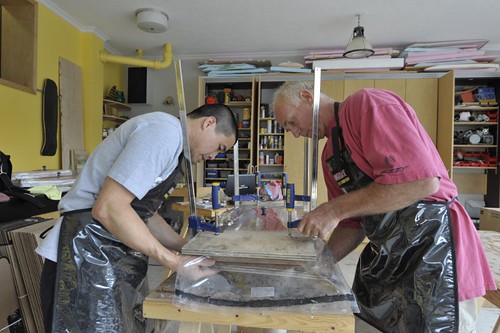
Repeat this on the other side of the deck. Remember the glue is drying and timing is critical. Work as quickly as possible.
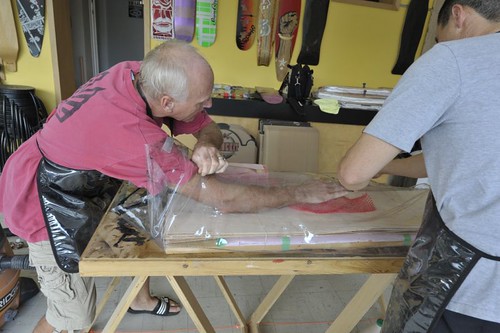
Using your manual or electric pump evacuate all the remaining air from your TAP bag.
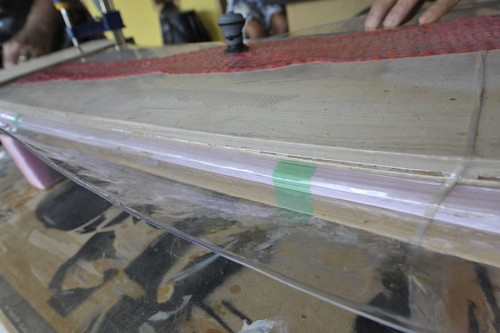
If the bag has pulled between the foam mold and veneer, grasp the edge of the TAP bag and firmly pull the material outward. This will ensure the veneer is pressed tightly at the edges of your deck.
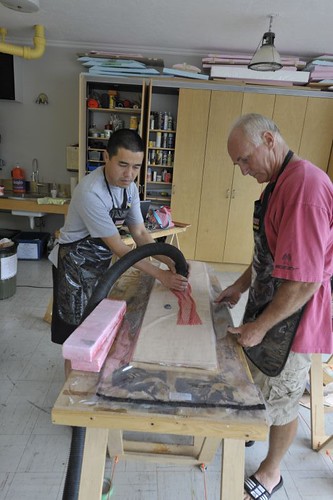
That’s it! It’s chill time until your glue dries. Wait at least 8 hours before removing the deck from the bag.


Underneath is the uncut blank, on top is an existing drop deck we used as a template to draw our profile onto the deck. You can shape your own.
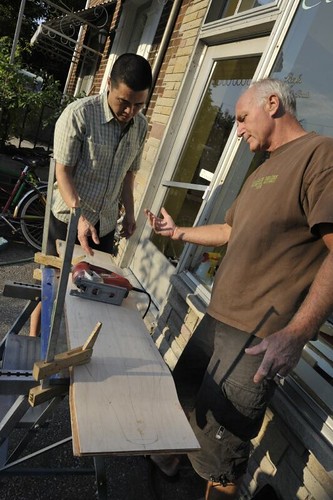
Using a jig saw with a sharp blade, cut your deck from the blank. It is better to cut outside the line and hand shape your deck using a surform and sander to its final shape. This is much better than losing your line by cutting through it and having to re-shape your deck by eye.
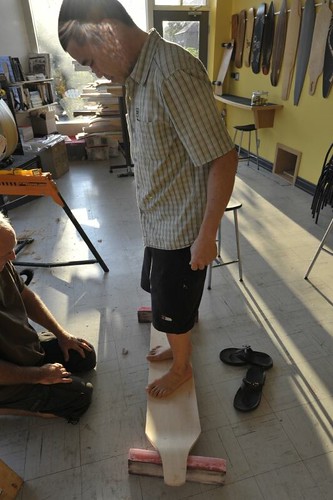
Check out the flex, see how it works by placing blocks where the trucks would be mounted. Sand and finish the deck as you would any other.
I will get pictures of the finished deck from Peter who built the deck. He lives in New Zealand. I will post them here.
As mentioned before, this deck is an advanced build but not beyond any deck builder with experience using a vacuum bag.
Hope you enjoyed this tutorial and if you make a deck using it, send us some pictures to post on our blog!
Ted from Roarockit.