This tutorial describes all the steps necessary to laminate our ROCKITLAM to a longboard.

Rockitlam
MATERIALS NEEDED:
ROCKITLAM: This material is plastic laminate. It is resistant to scratching and can be painted. The ROCKITLAM replaces one layer of 1/16″ maple veneer, so if you like the feel of a 7 layer deck, replace one layer of veneer with ROCKITLAM. It will make a deck that is slightly stiffer than the equivalent 7 layer maple deck. Most of our ROCKITLAM colors are lighter than or equivalent to the weight of the same sized sheet of 1/16″ maple veneer. Thicknesses vary depending on the color.
ONE SIDED FOAM MOLD: If you have not built a foam mold check out our tutorials on shaping foam molds.
TITEBOND III: In our opinion this is the best glue for building custom skateboards and provides a permanent, waterproof bond between ROCKITLAM and maple veneers.. DO NOT USE CONTACT CEMENT TO BOND ROCKITLAM TO THE VENEERS. It will not provide a waterproof, permanent bond.
SANDPAPER: 100, 150 and 220 grit If you have a disk sander it will cut down on the sanding time.
CLEAR POLYURETHANE FINISH
TOOLS NEEDED:
PAINT ROLLER
JIG SAW
HAND SURFORM
RECIPROCATING DISK SANDER: This speeds up the sanding process but can also be done by hand sanding.
STEP ONE
Select your veneers. Place in order of gluing. The ROCKITLAM should be placed on the bottom of the stack. Do not remove the protective covering on the material until the deck is completely finished.
Make sure your materials and tools are close at hand. The Titebond III gives us 9 minutes of time from start to finish. You need to work quickly!
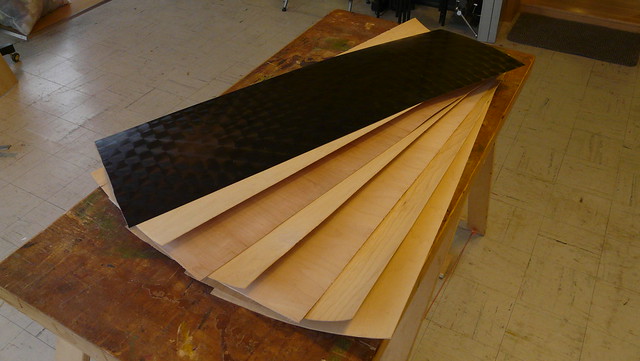
Maple Veneers
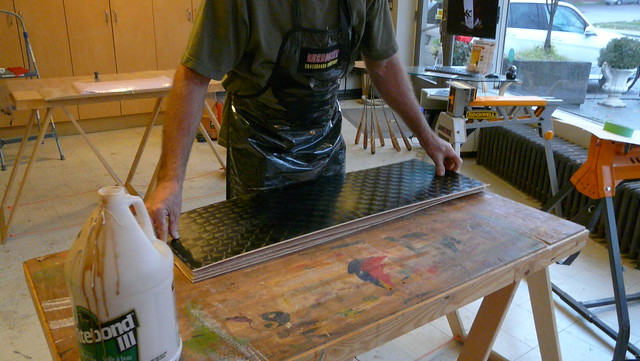
Start applying the glue as shown in the picture below. A thin-napped roller works great. A great tip is to put your glue filled roller, after your glue session into a plastic bag. Do not wet or clean it out. You will save on recharging your roller with glue each time you use it. It will last for weeks in the bag. Do not freeze.
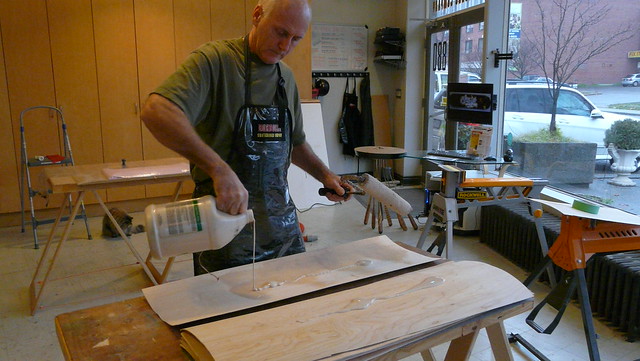
Applying Titebond III Glue
Carefully stack each layer one on top of another. We apply glue to both the top and bottom layers. Do not over-glue. A thin, even coat of glue is all that is needed. The pictures above and below give you an idea of the amount of glue added to each layer.
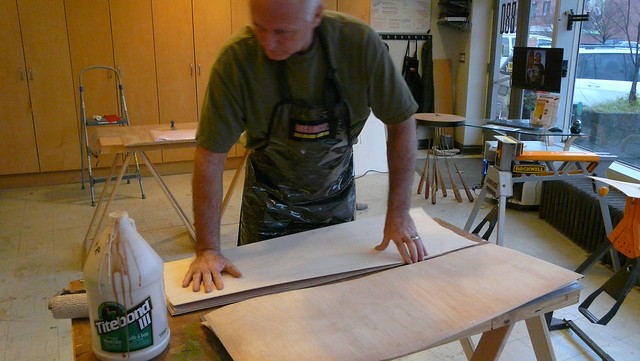
Stacking the veneers
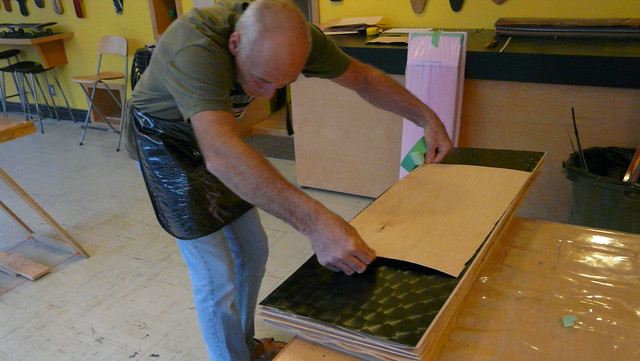
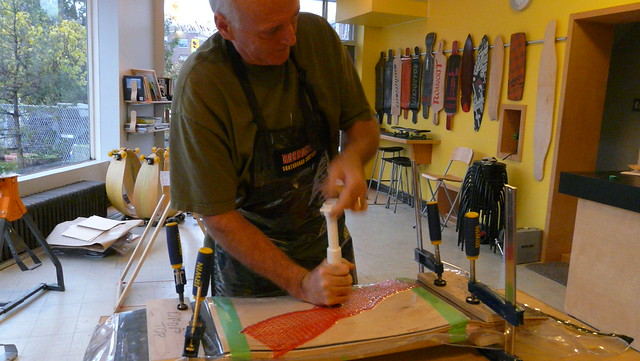
When you finally get to the ROCKITLAM layer apply glue in the same fashion as the previous layers. ROCKITLAM is glue permeable so will make a bond as strong as the wood laminations in your deck.
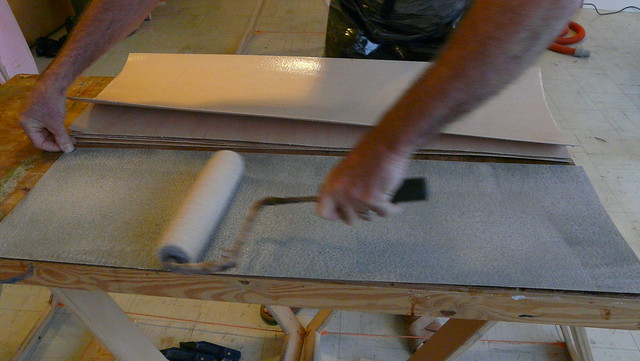
Applying the glue to the Rockitlam
Positioning the Rockitlam on the deck
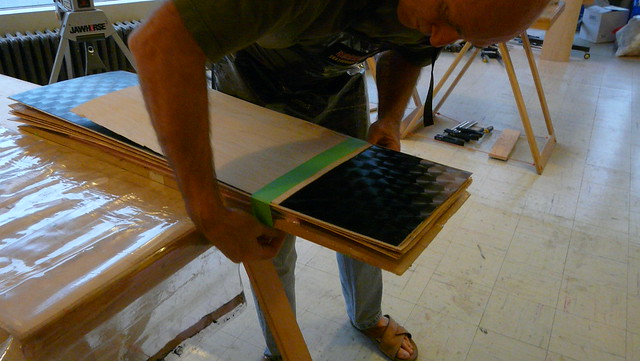
Place the stack of veneers and ROCKTLAM onto your mold. We use masking tape to hold the stack in position as shown below. A good tip is to use a layer of cellophane tape, applied to the foam mold as a separator. Do this before starting your glue up.
We also have placed a scrap piece of maple veneer on top of the ROCKITLAM as shown below. This will prevent an indentation in the lam created from the center mount valve on the TAP bag when we pull a vacuum.
Place a scrap piece of maple veneer on top of the Rockitlam
Use a layer of cellophane tape, applied to the foam mold as a separator
Now it’s time to put your project into the TAP bag. Be careful not to damage the bag with the sharp corners of the ROCKITLAM.
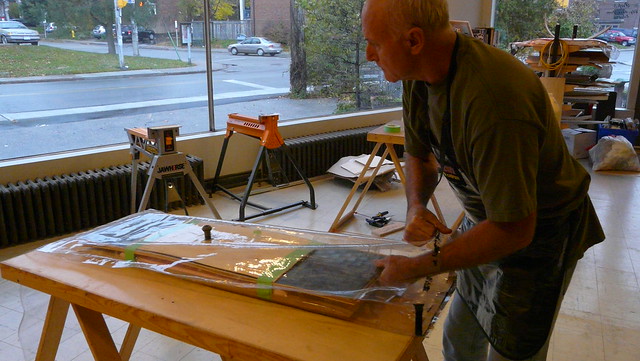
Place your project in the Tap bag
Properly seal the TAP bag and remember to save the paper cover.
We use a vacuum cleaner to suck most of the air from the TAP bag. The valve has a removable cap. Once most of the air is removed, place the cap back on the valve and remove the remaining air with the manual pump included in your kit.
Remove the remaining air with the manual pump
After a few minutes, check your pressing for any leaks. If there is a leak, look for any pathways in the tape where air could seep into the bag. Repress the sealing tape where necessary.
Wait at least 8 hours for the Titebond III glue to dry. Remove your deck from the TAP bag. Again be careful, as the ROCKITLAM can tear the bag easily.
STEP TWO
It is important to protect your ROCKITLAM while jigsawing your shape out of the blank you just pressed. We apply a layer of masking tape over top of the factory installed protective covering. The baseplate of the jigsaw can easily scratch an unprotected surface.
Mark your centerline on the deck by measuring across your deck at either end and finding center. Then using your paper template, mark your deck profile and band saw the shape out as shown below.
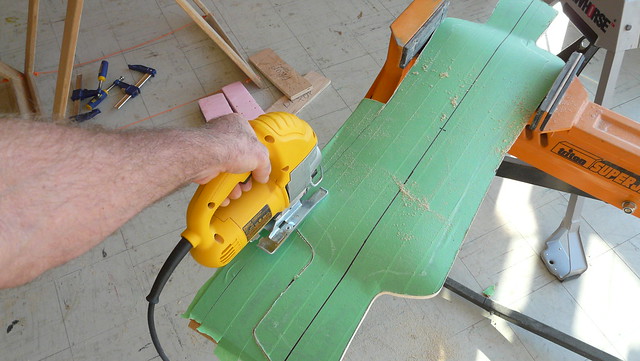
Band saw your desired shape out
Scrape and sand, as you would any deck edge profile using a Surform and 100 to 220 grit sandpaper. Sand the edge of the ROCKITLAM round but do not sand the face.
Once this is completed, all that is left is to seal the edge of the deck using a quality outdoor polyurethane spray or brushed finish. Do not put finish onto the ROCKITLAM face.
We are working on a ROCKITLAM paint tutorial that will be posted here soon.
Ted from Roarockit.
Drop Deck

Small pointy nosed deck